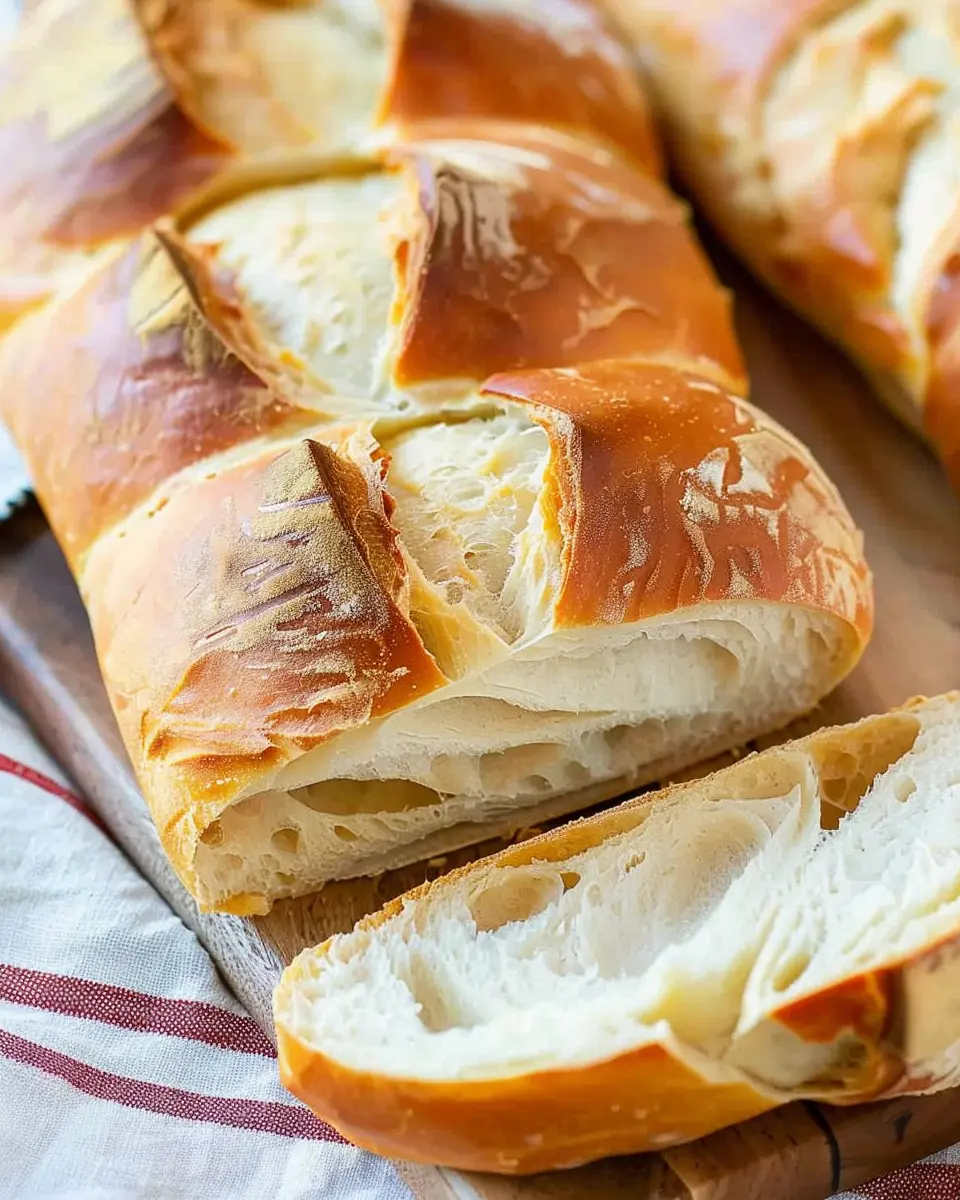
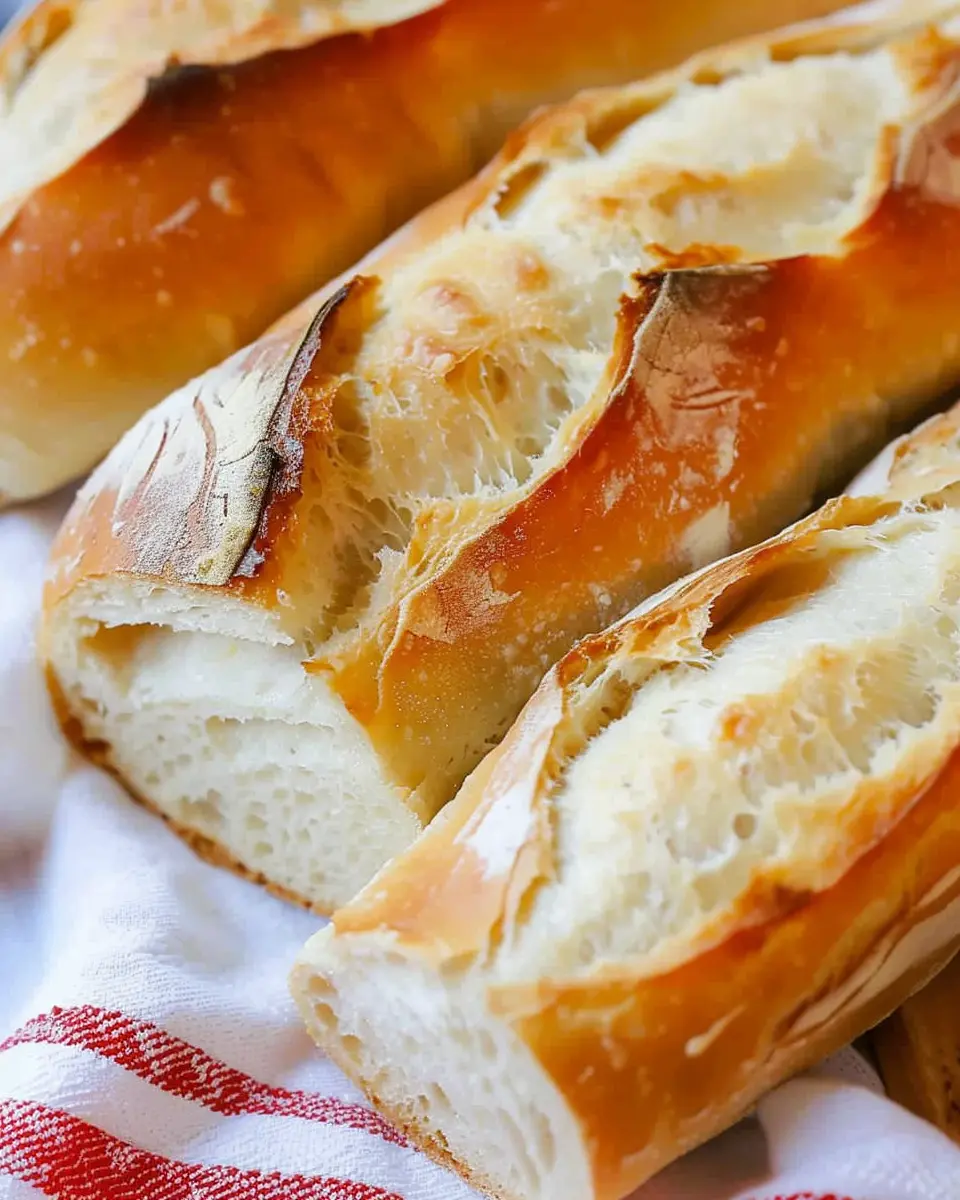
Introduction to Homemade French Bread
When you think of homemade French bread, you might envision the delightful aroma of fresh loaves baking in the oven, filling your kitchen with warmth and comfort. But why is making your own French bread worth the effort? Let’s delve into the delightful world of homemade bread!
Why Homemade French Bread is Worth Making at Home
First and foremost, there’s something incredibly satisfying about kneading dough with your own two hands. Not only does the act of bread-making engage your senses, but it also fosters a sense of accomplishment that store-bought bread just can’t match. The process of creating homemade French bread allows you to control the ingredients, ensuring you get a product that’s both delicious and made with love.
Moreover, baking bread at home can be a great way to save money. Did you know that bakery French bread can often cost upwards of $5 a loaf? By making your own, you can create multiple loaves for just a fraction of the price. Plus, the ingredients are simple: flour, water, yeast, and salt—there’s no need for preservatives or other fillers that you might find in commercial bread.
Beyond the fiscal benefits, let’s consider the health side of things. With homemade French bread, you can experiment with different flours or add ins like seeds or herbs that appeal to your palate. A study from the University of California Davis indicates that consuming whole grains can reduce the risk of heart disease and improve digestive health. So, why not make a loaf that aligns with your health goals?
Another huge advantage of making French bread at home is the customization. You can bake it to your desired crustiness, using your favorite herbs for flavor. Do you love rosemary? Toss some into the dough! The possibilities are endless.
Are you ready to embark on a baking adventure? Trust me; your future self—sitting down to enjoy a warm slice topped with a perfect layer of butter—will thank you.
For those eager to dive deeper into the benefits of bread baking, check out this insightful piece from the American Baking Association.
Essential Ingredients for Perfect French Bread
Creating homemade French bread is a truly rewarding experience, and it all starts with the right ingredients. Here’s what you’ll need to craft that delightful crusty loaf:
-
All-purpose flour: This is the backbone of your bread. Aim for about 4 cups. The protein in the flour offers structure and chewiness.
-
Water: About 1 and 1/2 cups of warm water (around 110°F) helps activate the yeast. Too hot and it will kill the yeast; too cold, and it won’t activate properly.
-
Yeast: You’ll need 2 and 1/4 teaspoons of active dry yeast, which gives the bread its lovely rise.
-
Salt: Use 2 teaspoons of salt to enhance flavor and strengthen the dough.
-
Sugar: Just a teaspoon for that little boost of flavor.
With a few simple ingredients, you can create a masterpiece right in your kitchen. Fresh bread can elevate any meal or stand alone as a comforting snack. For more tips on elevating your baking skills, check out this baking essentials guide.
Have fun experimenting with these ingredients, and before you know it, you’ll have baked your very own delicious loaf of homemade French bread.
Preparing Homemade French Bread
Baking homemade French bread isn’t just about mixing flour and water; it’s about creating a warm, comforting loaf that fills your kitchen with delightful aromas. This guide walks you through each step of the process, so you can confidently bake a loaf that rivals any bakery.
Activate the Yeast
The first step to achieving the perfect homemade French bread is to activate your yeast. This is crucial because the yeast is what gives your bread that wonderful rise and airy texture.
- Ingredients: You’ll need 2 teaspoons of active dry yeast and about 1 teaspoon of sugar.
- Warm Water: Measure out 1 cup of warm water (between 100°F to 110°F – think lukewarm to the touch).
- Procedure: In a small bowl, combine the yeast, sugar, and warm water. Let it sit for about 5-10 minutes. You’ll notice it becoming frothy – that’s a good sign your yeast is alive and ready to work its magic.
Combine Dry Ingredients
While your yeast is frothing, it’s time to prepare the dry ingredients.
- Flour: Measure out 4 cups of all-purpose flour. You may need more as you knead, so keep some extra handy.
- Salt: Don’t forget the salt! Adding 1.5 teaspoons enhances flavor and controls the fermentation process.
- Combine: In a large mixing bowl, whisk together the flour and salt, creating a well in the center for the yeast mixture. Feeling creative? You can even add some herbs or spices at this stage for an extra flavor punch.
Prepare the Dough
Now that you have both your yeast mixture and dry ingredients ready, it’s time to combine them.
- Mix: Pour the yeast mixture into your flour well. Use a wooden spoon or your hands to stir until a shaggy dough forms. If it’s too sticky, add small amounts of flour, a tablespoon at a time.
Knead and Rest the Dough
This part is essential for developing gluten, which gives bread its structure and chew.
- Kneading: Transfer your dough to a floured surface. Knead for approximately 8-10 minutes—it should be smooth and elastic. If you’ve never kneaded before, picture a gentle but firm hugging and folding motion.
- Rest: Place the kneaded dough in a lightly greased bowl and cover it with a clean kitchen towel. Let it rest for about 1 hour, or until it doubles in size. Pro tip: Place the bowl in a warm spot to encourage quick rising.
Shape the Loaves
After your dough has risen, it’s time to shape it into loaves.
- Divide: Punch down the dough gently to release excess gas, then divide it into two equal pieces.
- Shape: Roll each piece into a loaf shape—think of it like making a baguette, but you can also make a more traditional loaf if you prefer. Make sure the seams are tight for even baking.
Allow the Dough to Rise Again
Before baking, let your formed loaves rise again.
- Second Rise: Place the shaped dough onto a parchment-lined baking sheet. Cover it with a towel again and let it rise for about 30-45 minutes until it puffs up. This second rise is crucial for achieving that airy interior you love in a great loaf.
Bake the Bread
Now comes the best part—the baking!
- Preheat: Preheat your oven to 425°F (220°C). Before placing the dough in the oven, make several shallow slashes on top of each loaf with a sharp knife. This helps the bread rise effectively while baking.
- Water Steam: To create a crispy crust, place a shallow pan of water at the bottom of your oven while it preheats. This steam will give your crust that fantastic bakery-style crunch.
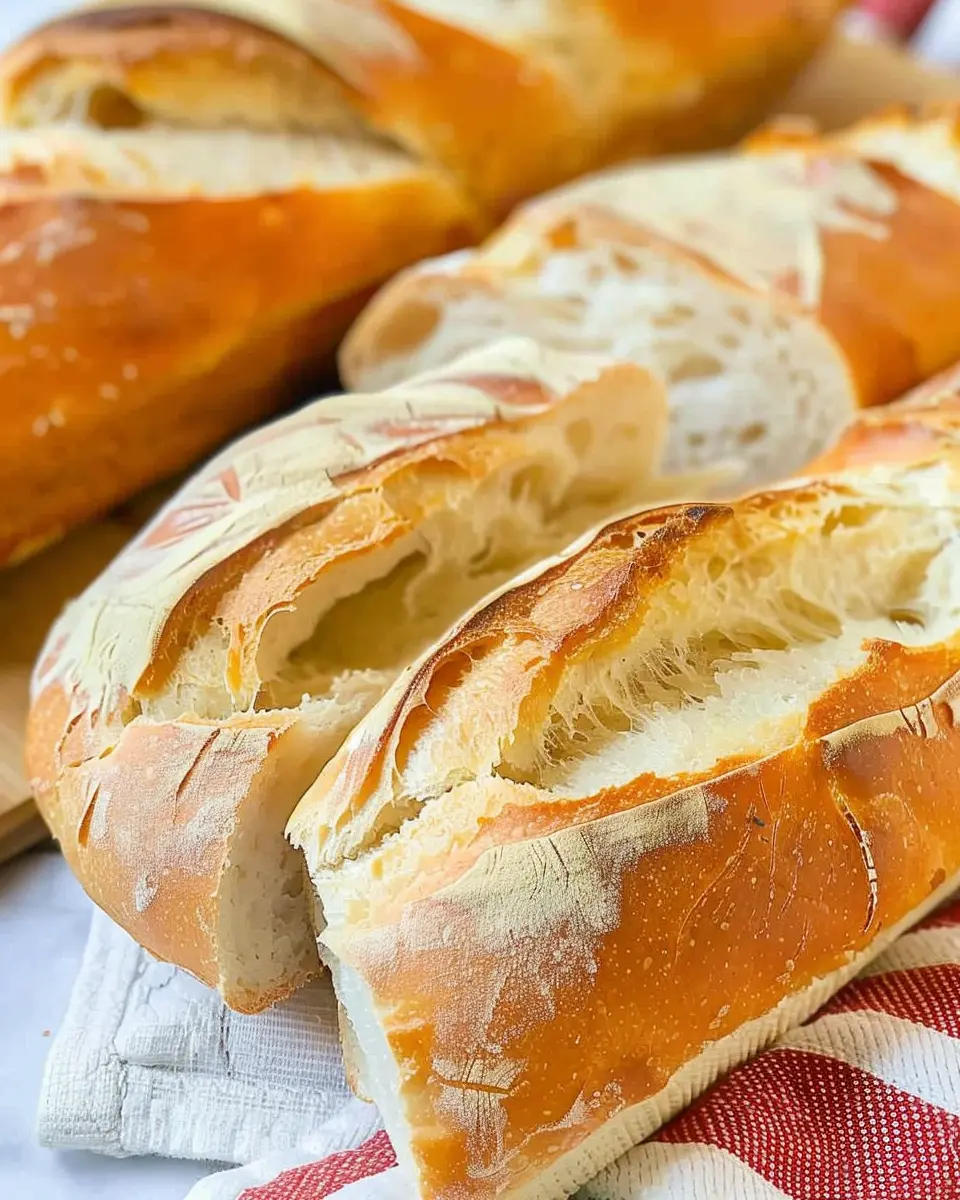
- Bake: Slide in the bread and bake for 25-30 minutes, or until the crust is golden brown and the bread sounds hollow when tapped.
Allow your homemade French bread to cool completely on a wire rack before slicing. Enjoy it fresh, or try pairing it with olive oil or some hearty spreads. There’s nothing quite like that fresh-baked aroma wafting through your kitchen! For more tips on bread baking, check out resources from the King Arthur Baking Company.
With a little practice and patience, you’ll be whipping up delicious homemade French bread that will impress every guest!
Variations on Homemade French Bread
Homemade French bread is a timeless classic, but why stop at the basics? With a few simple tweaks, you can create delightful variations that cater to different tastes and occasions. Here are some crowd-pleasing options that elevate your homemade bread game.
Cheesy French Bread
If you’re a cheese lover, cheesy French bread is the perfect twist for you! Imagine a golden crust with a gooey, cheesy center melt-in-your-mouth goodness. Here’s how to achieve this delicious version:
- Choose Your Cheese: A blend of mozzarella and cheddar works brilliantly for a stretch and flavor. For a gourmet touch, consider adding gruyère or fontina.
- Prep Your Base: Before baking, sprinkle a generous layer of shredded cheese on top of your dough. For an even cheesier effect, incorporate some into the dough itself.
- Bake and Enjoy: The cheese will melt beautifully, forming a savory crust that pairs perfectly with soups and salads. Trust us, leftovers (if any) will make exceptional sandwich material!
Herb-Infused French Bread
Elevate your homemade French bread with aromatic herbs that tantalize the senses. Fresh or dried herbs can transform your loaf into a fragrant masterpiece. Here’s how:
- Select Your Herbs: Rosemary, thyme, basil, or a mix can enhance the flavor profile. Choose what you love or try a bit of everything!
- Incorporate Flavor: Add chopped herbs to your dough during the mixing phase or sprinkle them on top before baking for an aromatic finish.
- Perfect Pairings: This herb-infused version shines when served with olive oil for dipping or as a side to grilled chicken or turkey bacon.
For more ideas on how to elevate your French bread, consider checking resources like The Kitchn or Serious Eats for in-depth baking tips and techniques. Happy baking!
Cooking Tips and Notes for Homemade French Bread
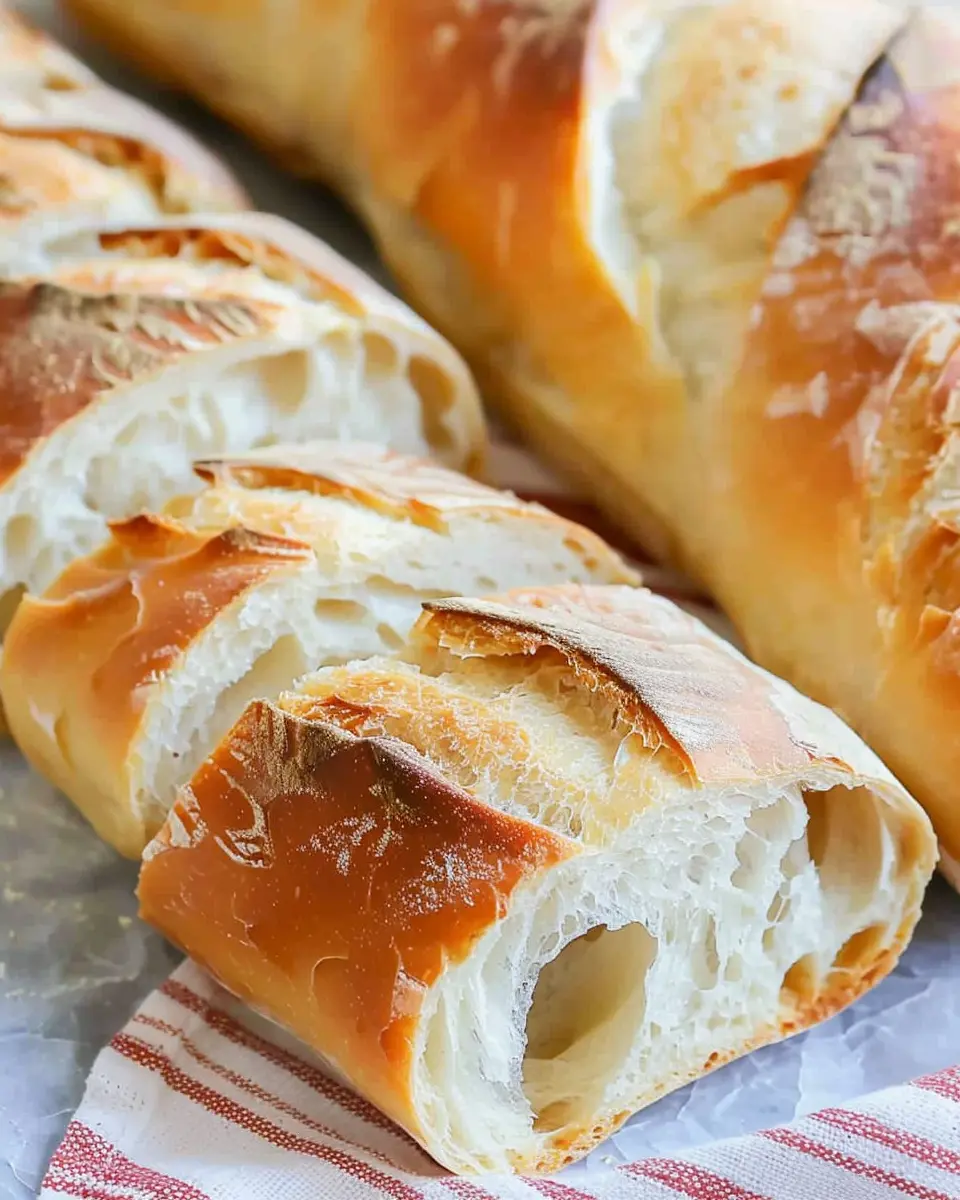
Achieving the Perfect Crust
Getting that ideal crust on your homemade French bread is a delightful challenge. Here are a few tips to make it perfectly crispy:
- Steam is key: Place a pan of hot water in the oven while baking. This moisture will create steam, helping to form a beautiful crust.
- Bake at a high temperature: Start at 450°F (230°C) for the first part of baking. This initial heat helps the dough rise swiftly.
- Cool it down: After baking, let the bread cool on a wire rack. This ensures the crust stays crispy rather than soggy.
Storing and Freezing Your Bread
To keep your homemade French bread fresh longer, proper storage is essential:
- At room temperature: Wrap it in a clean kitchen towel placed in a breadbox or a paper bag. Avoid plastic as it traps moisture.
- Freezing for later: Slice your bread before freezing. Store it in an airtight bag, and it should last for up to three months. When you’re ready, thaw it and pop it in the oven briefly to refresh the crust.
For more storage tips, check out resources from King Arthur Baking or Food52. Happy baking!
Serving Suggestions for Homemade French Bread
Pairing with Dips and Spreads
There’s nothing quite like the delightful aroma of homemade French bread fresh from the oven. When serving it, consider pairing with a variety of dips and spreads to elevate your dining experience. Creamy hummus, tangy tzatziki, or a rich olive tapenade are perfect companions that complement the crusty texture of your bread. For a warm option, try a cheesy spinach dip or a classic bruschetta topped with tomatoes and basil.
Want something sweeter? Whip up a delicious honey butter or pair it with fresh fruit preserves for a delightful breakfast treat. These options not only enhance the flavor but also invite your guests into a cozy eating experience.
Using French Bread in Other Dishes
Don’t limit your homemade French bread to just standalone enjoyment. Slice it thin and layer it in a tasty panini with chicken ham and turkey bacon, or use it as a base for delectable French toast topped with fresh fruits and maple syrup. If you’re in the mood for something hearty, consider creating a classic French bread pizza topped with your favorite ingredients; it’s a fun twist that always pleases the crowd.
By exploring these serving suggestions, you’ll find new ways to enjoy your homemade French bread, making it a versatile highlight in any meal! For more ideas, check out Serious Eats or The Kitchn.
Time Breakdown for Homemade French Bread
Making homemade French bread is a rewarding experience, and you’ll want to know how to manage your time efficiently. Here’s a breakdown to help you plan your baking session.
Preparation Time
Getting started on your homemade French bread takes about 20-30 minutes. This includes mixing your ingredients, kneading the dough, and letting it rise for the first time. While you’re at it, you can prepare an easy dish to accompany the bread. Try pairing it with homemade soups or a savory chicken ham dip!
Baking Time
Once your dough has risen beautifully, it’s time for the oven. Baking will take around 25-30 minutes. The thrill of watching your bread turn golden brown is truly worth the wait.
Total Time
From preparation to that first slice, expect your total time to be about 1 hour and 30 minutes. Keep in mind that some rising times may vary, so it’s good to factor in a little extra time just in case. With a bit of patience, you’ll be rewarded with the most delightful homemade French bread!
For more tips on becoming a bread-making guru, check out the King Arthur Baking Company, an excellent resource for baking techniques and recipes!
Nutritional Facts for Homemade French Bread
Calories
A slice of homemade French bread typically contains around 80-100 calories. This makes it a great option for enjoying without overindulging. The exact calorie count can vary depending on the recipe and any toppings you might add.
Carbohydrates
In terms of carbohydrates, a single slice provides about 15-20 grams. While carbs are often viewed with caution, they are an essential source of energy, especially for active lifestyles. Whole grain variations can enrich your bread with fiber, promoting digestion and overall health. If you’re interested in a deeper dive into nutrition, you might want to check out Healthline’s guide on carbohydrates.
How to Enjoy it Guilt-Free
Want to savor your homemade French bread without the guilt? Here are some tips:
- Go light on spreads: Instead of butter, try avocado or hummus for a creamy, flavorful alternative.
- Pair wisely: Stack it with lean proteins like Turkey Bacon or Chicken Ham alongside fresh veggies for a balanced meal.
- Mind your portions: Enjoy one or two slices, and you can enjoy your bread while keeping an eye on your overall intake.
Engaging with food is all about balance! Have you found favorite ways to enjoy bread that feel both indulgent and healthy? Share your thoughts!
FAQs about Homemade French Bread
Making homemade French bread is a delightful experience, but it’s natural to have questions along the way. Here are some common inquiries that can help you achieve that perfect loaf.
Can I use whole wheat flour instead of all-purpose flour?
Absolutely! You can substitute whole wheat flour for the all-purpose flour, but keep in mind that it may change the texture and flavor of your bread. Whole wheat flour tends to absorb more liquid, so you might need to adjust the liquid in your recipe slightly. It’s also a good idea to start with a mix—maybe 50% whole wheat and 50% all-purpose—to find the right balance. For more on flour types, you can check out King Arthur Baking.
Is it normal for the dough to stick initially?
Yes, it’s perfectly normal for your homemade French bread dough to be a bit sticky at first. Don’t panic! As you knead, the dough will become smoother and easier to handle. If it remains excessively sticky, you can add a little extra flour or oil to ease the stickiness, but be careful not to overdo it.
How do I know when my bread is done baking?
A few foolproof methods can help you determine when your bread is ready. Firstly, it should be golden brown on the top, and tapping the bottom should produce a hollow sound. Additionally, using an instant-read thermometer, your loaf should reach about 190°F to 200°F in the center. Trust me, once you get the hang of it, you’ll develop a knack for knowing when your homemade French bread is perfectly baked!
As you journey through your bread-making process, remember that practice makes perfect. Enjoy experimenting with flavors and textures as you find your unique take on this classic recipe!
Conclusion on Homemade French Bread
Final Thoughts and Encouragement to Try Making Your Own Bread
There’s something incredibly satisfying about creating homemade French bread from scratch. The delightful aroma wafting through your kitchen is just the beginning! Whether you’re planning a cozy dinner or looking to impress your friends, freshly baked bread always elevates the meal.
Don’t hesitate to give this a try! Baking is as much about the joy of the process as it is about the final product. Remember, practice makes perfect. Each loaf will teach you a little more, allowing you to refine your skills. For tips on kneading techniques, consider checking out resources like King Arthur Baking for expert advice. You might just discover that making bread at home is not only fun, but it also transforms the way you enjoy your meals. Happy baking!
PrintHomemade French Bread Made Easy: Perfect for Every Meal
Learn how to make delicious homemade French bread that pairs perfectly with any meal.
- Prep Time: 15 minutes
- Cook Time: 35 minutes
- Total Time: 1 hour 50 minutes
- Yield: 1 loaf 1x
- Category: Bread
- Method: Baking
- Cuisine: French
- Diet: Vegetarian
Ingredients
- 4 cups all-purpose flour
- 1 tablespoon sugar
- 1 tablespoon salt
- 1 packet active dry yeast
- 1 and 1/2 cups warm water
Instructions
- In a large bowl, mix warm water, yeast, and sugar. Let it sit for 5 minutes.
- Add flour and salt to the yeast mixture. Stir until a dough forms.
- Knead the dough on a floured surface for about 10 minutes.
- Place the dough in a greased bowl, cover, and let it rise for 1 hour.
- Punch down the dough, shape it into a loaf, and place it in a greased loaf pan.
- Cover the dough and let it rise for another 30 minutes.
- Bake in a preheated oven at 375°F for 30-35 minutes until golden brown.
- Cool on a wire rack before slicing.
Notes
- For a crustier bread, bake on a stone or place a pan of water in the oven.
- Experiment with adding herbs or spices for added flavor.
Nutrition
- Serving Size: 1 slice
- Calories: 120
- Sugar: 1g
- Sodium: 400mg
- Fat: 1g
- Saturated Fat: 0g
- Unsaturated Fat: 0g
- Trans Fat: 0g
- Carbohydrates: 24g
- Fiber: 1g
- Protein: 4g
- Cholesterol: 0mg
Keywords: Homemade French Bread, French Bread Recipe, Easy Bread Recipe