Outline for Sweet Tart Crust (Pâte Sucrée) Blog Post
Creating a perfect sweet tart crust (pâte sucrée) can elevate your dessert game and give you a delightful base for any filling you choose. Here’s a handy outline that both guides you through the recipe and engages your readers with helpful insights, personal touches, and essential tips for success.
Understanding the Basics of Sweet Tart Crust
To kick off your article, start by explaining what a sweet tart crust is. Discuss why it’s distinct from other types of crusts, highlighting its tender, crumbly texture that melts in your mouth. Provide a brief historical context or mention its origins in French pastry, making it relatable for those curious about culinary traditions.
- What Makes It Unique: Share details about the ingredients like butter, sugar, and flour, emphasizing how the ratio creates that rich flavor and delicate crust.
- Perfect for Any Occasion: From baking pies to filling tarts, explain the versatility of this crust. It’s a go-to for sweet and savory dishes alike!
Essential Ingredients You Will Need
Listing the ingredients is crucial for any good recipe. Make it engaging by briefly describing each component and its role without overwhelming your readers.
- Key Ingredients:
- All-purpose flour: Forms the base of your crust.
- Unsalted butter: Adds flavor and richness.
- Sugar: Sweetens and gives that melt-in-your-mouth quality.
- Egg yolk: Provides richness and helps bind everything together.
- Salt: Balances the sweetness.
Linking to sources like King Arthur Baking can provide further authority on ingredient selection, while a quick note on ingredient substitutes (like gluten-free flour options) can make the recipe more accessible.
Step-by-Step Instructions for Making Your Sweet Tart Crust
Break down the process of making a sweet tart crust into simple steps. This friendly tone encourages confidence, inviting readers to try the recipe.
- Prepare Your Ingredients: Always start with chilled butter for the best texture.
- Mixing the Dough: Demonstrate how to properly cream butter and sugar, then incorporate the flour for that tender crust.
- Chill Time: Discuss the importance of resting the dough in the fridge before rolling it out to avoid shrinkage during baking.
- Rolling Out the Dough: Offer tips on how to roll and transfer the dough to a tart pan without tearing it.
Including personal anecdotes, like the first time you made this crust, can make the narrative more relatable. Share a little mishap that made you better at the process—perhaps forgetting to chill the dough and ending up with a soggy crust!
Baking Tips for Perfecting Your Sweet Tart Crust
No one wants a soggy bottom, right? Offer expert baking tips to ensure the crust turns out just right every time:
- Docking the Dough: Explain why it’s crucial to poke holes in the bottom before baking. This prevents bubbling and helps it bake evenly.
- Blind Baking: Discuss the benefits of blind baking, especially for recipes that call for fillings that don’t require further cooking.
- Chill Between Layers: Remind readers that even a subtle chilling phase can significantly improve the final product.
Pairing Suggestions for Your Sweet Tart Crust
As an engaging conclusion to your recipe, suggest fillings that complement the sweet tart crust. Think fresh fruit, rich chocolate ganache, or even a tangy lemon curd. Each option can cater to various taste preferences, making it a versatile dish.
- Classic Fillings: Highlight some timeless favorites like lemon curd or pastry cream.
- Modern Twists: Encourage readers to be adventurous with options like spiced pumpkin filling or coconut custard.
Invite your readers to experiment and share their own filling creations in the comments section. Connecting with your audience fosters community and ongoing interaction around your blog!
Final Thoughts and Encouragement
End with a warm encouragement to try making the sweet tart crust at home, reinforcing that the joy of baking lies in experimentation and personal touches. Encourage feedback on the recipe and ask readers to share their creations on social media.
By following this outline and maintaining a friendly, approachable tone, your blog post on sweet tart crust will not only provide an informative resource but also engage your audience, guiding them through the delightful world of pastry making. Happy baking!
Introduction to Sweet Tart Crust
Why homemade sweet tart crust is a game-changer
Baking your own sweet tart crust can elevate your dessert game in ways you might not expect. Store-bought options often rely on preservatives and artificial flavors, while a homemade version allows you to control the ingredients and, most importantly, the flavor. You might be surprised to know that using fresh, quality ingredients can significantly enhance the taste and texture of your desserts. Did you know that many professional bakers swear by their homemade crusts? This isn’t just a culinary trend; it’s about delivering that fresh-from-the-oven experience. If you’re looking to impress at your next gathering or simply treat yourself, making your own is a small but potent step.
The joy of baking: A personal story
I still remember the first time I tried to bake a tart. It was a rainy Saturday afternoon, and I had the house to myself. Armed with modest kitchen tools, I decided to take a leap of faith. As the sweet tart crust began to come together, I found myself lost in the process—mixing, rolling, and finally shaping it into a perfect shell. When it came out of the oven, golden and flaky, the smell filled my kitchen like a big, warm hug. That little experience was transformative for me; it ignited a passion that still fuels my weekends today. Baking is more than just a task—it’s a creative outlet, stress reliever, and a way to connect with others. Plus, it’s a fun way to experiment with healthier ingredients, which can really amplify the satisfaction of your creations.
Who this recipe is for
This recipe for sweet tart crust is tailored especially for young professionals who are looking to make healthier dessert choices without sacrificing flavor. If you’re juggling a busy schedule and want to whip up a quick yet impressive dessert to share with friends or bring to a gathering, this is the perfect starting point. Substituting refined sugars and flours with healthier alternatives can be simple and rewarding. Feel free to explore options like almond flour or natural sweeteners, which can make a delightful difference. With a little effort, you can enjoy delicious treats that not only taste good but also align with your health goals.
So, if you’re ready to dive into the world of homemade goodness, stick around for the full recipe. Your taste buds will thank you!
Ingredients for Sweet Tart Crust
Creating the perfect sweet tart crust can be incredibly satisfying, not to mention delicious. Here’s a breakdown of what you’ll need.
Essential ingredients for a perfect crust
To whip up a scrumptious sweet tart crust, gather these must-have ingredients:
- All-purpose flour: The base for your crust, providing that essential structure.
- Unsalted butter: For richness and a tender texture. Opt for high-quality butter for the best results.
- Powdered sugar: Adds sweetness and a bit of finesse.
- Egg yolks: Contributes to richness and helps bind the crust.
- Salt: Just a pinch enhances the overall flavor.
Optional ingredients for customization
Feeling adventurous? Consider these optional ingredients to elevate your sweet tart crust:
- Cocoa powder: For a chocolatey twist.
- Citrus zest: A hint of lemon or orange can brighten the flavor.
- Almond extract: Adds a subtle nutty aroma.
Tips for selecting the best ingredients
When it comes to your sweet tart crust, ingredient quality matters. Look for organic flour, and always choose fresh butter. For an extra touch, you can find tips from places like Serious Eats about the best butter and flour selections. Remember, quality ingredients lead to a better-tasting crust!
Preparing Sweet Tart Crust
Creating a sweet tart crust is an essential skill for any home baker, adding a delicious base to your favorite desserts. This uncomplicated yet indulgent crust is craved for its buttery, flaky texture and its sweet flavor, making it the perfect vessel for luscious fillings. Let’s walk through the preparation step by step!
Gather Your Ingredients and Tools
Before diving in, let’s ensure you have everything at your fingertips. Here’s what you’ll need:
Ingredients:
- Unsalted butter (1/2 cup, softened)
- Granulated sugar (1/4 cup)
- Egg yolk (1 large)
- Vanilla extract (1 teaspoon)
- All-purpose flour (1 1/4 cups)
- A pinch of salt
Tools:
- Mixing bowl
- Electric mixer or wooden spoon
- Rubber spatula
- Plastic wrap
- Rolling pin
- Tart pan or pie dish
Make sure to have a clean workspace. If you’re like me, a tidy kitchen can inspire some delicious creativity!
Creaming the Butter and Sugar
Now that we have all our ingredients gathered, we can start! The first step is creaming together the butter and sugar. Take your softened butter and add it to your mixing bowl.
Using an electric mixer on medium speed, cream the butter until it’s light and fluffy. This process should take about 2-3 minutes. It helps to incorporate air into the mixture, leading to a light texture in the final crust. If you don’t have a mixer, a good old wooden spoon works just as well—just put in some extra muscle!
Adding Egg Yolk and Vanilla Extract
Once your butter and sugar are creamed to perfection, it’s time to add in the egg yolk and vanilla extract. The egg yolk enriches the dough, giving it a beautiful flavor and helping it to bind together. Mix until well combined.
Did you know that vanilla extract is one of the most beloved baking ingredients? You can learn more about its history and uses at Baking 101.
Incorporating the Flour for Texture
Now, for the fun part! Gradually add the flour and a pinch of salt to your mixture. Mix slowly to avoid flour clouds filling your kitchen (we’ve all been there). The dough will start to come together. If it’s too crumbly, a little splash of cold water can help bind it without making it too sticky.
Shaping and Chilling the Dough
Once you have a cohesive dough, it’s time to shape it into a disk. Wrap it in plastic wrap and refrigerate for at least 30 minutes. Chilling the dough not only makes it easier to roll out but also helps it maintain its shape while baking.
While waiting, you could consider prepping some fillings. A luscious lemon curd or a rich chocolate ganache would pair beautifully with this sweet tart crust!
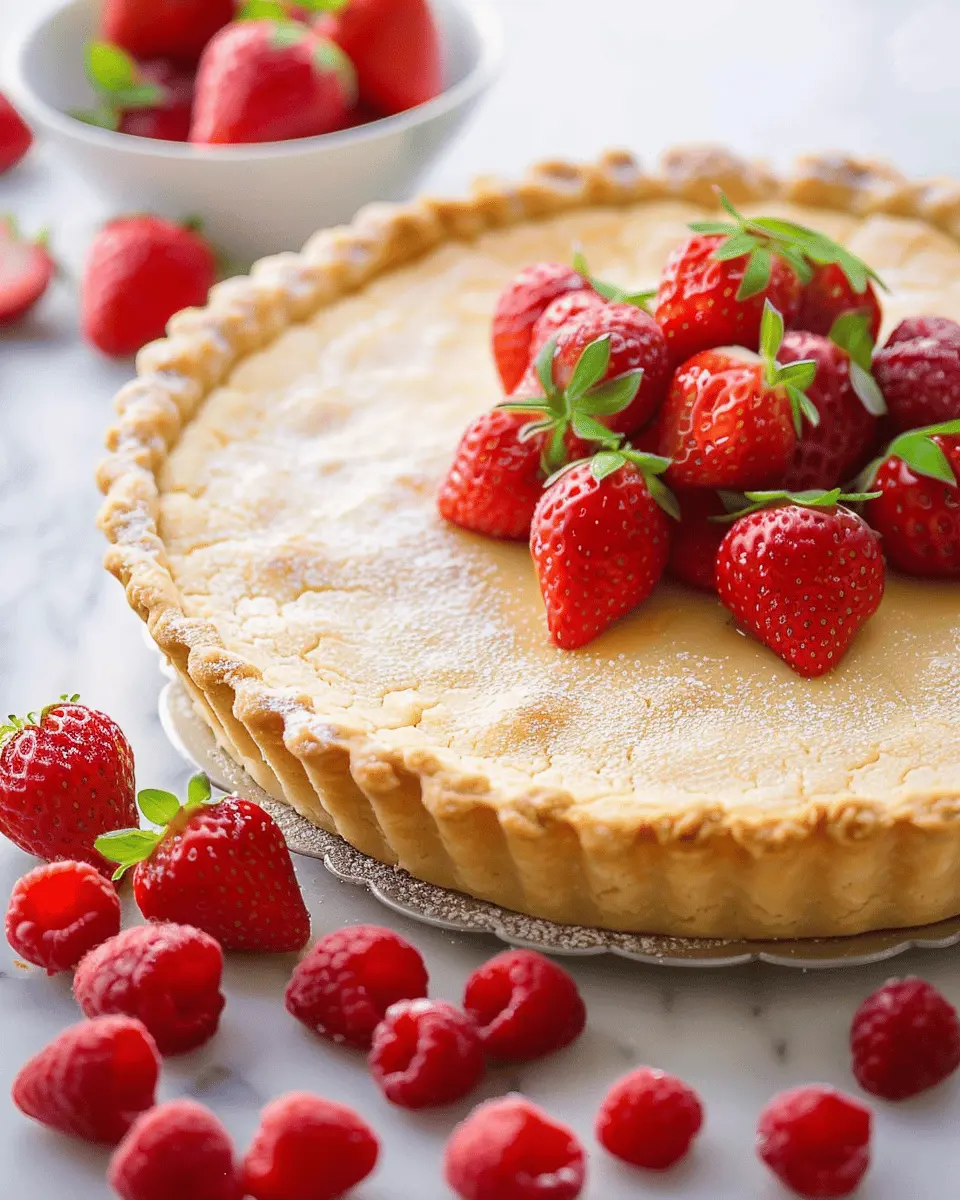
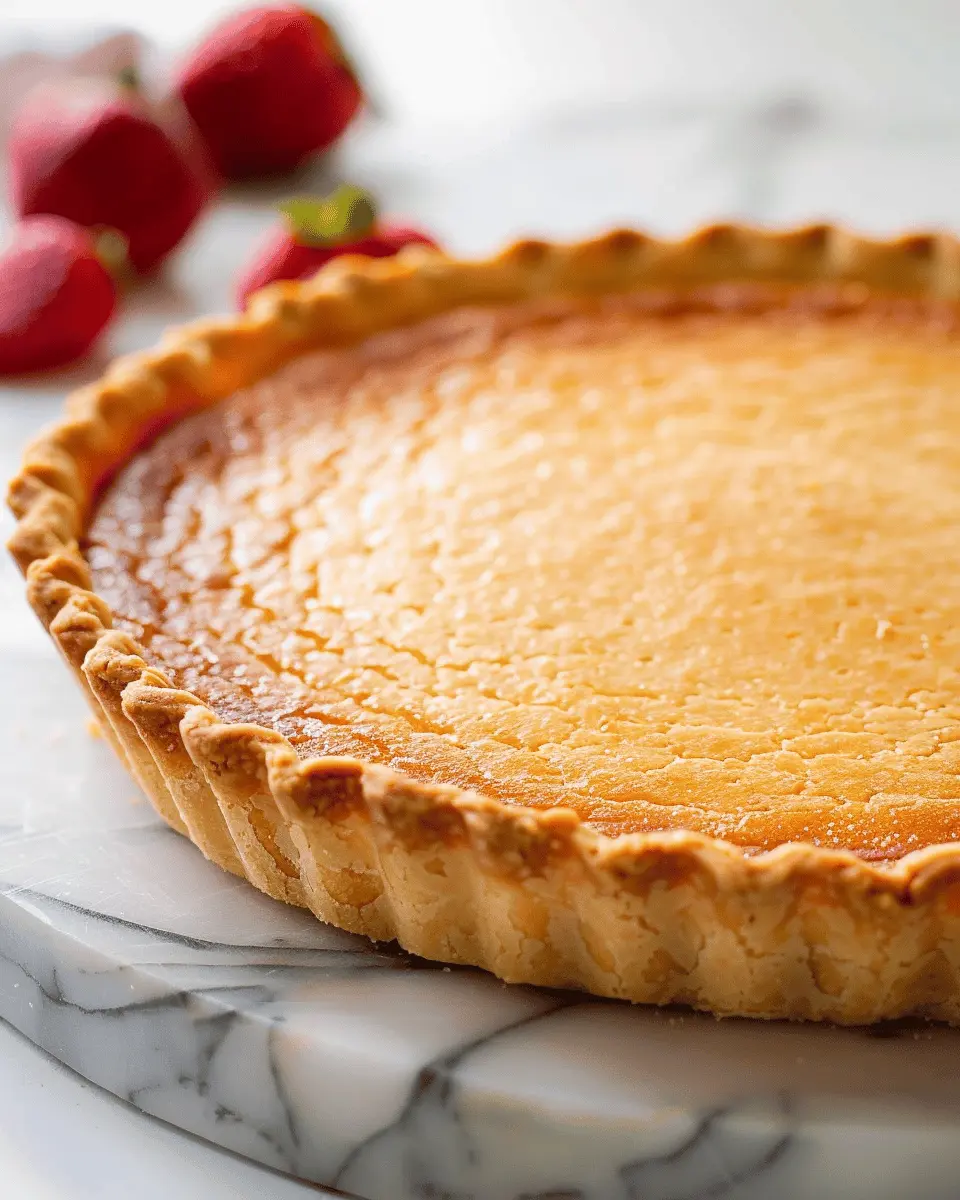
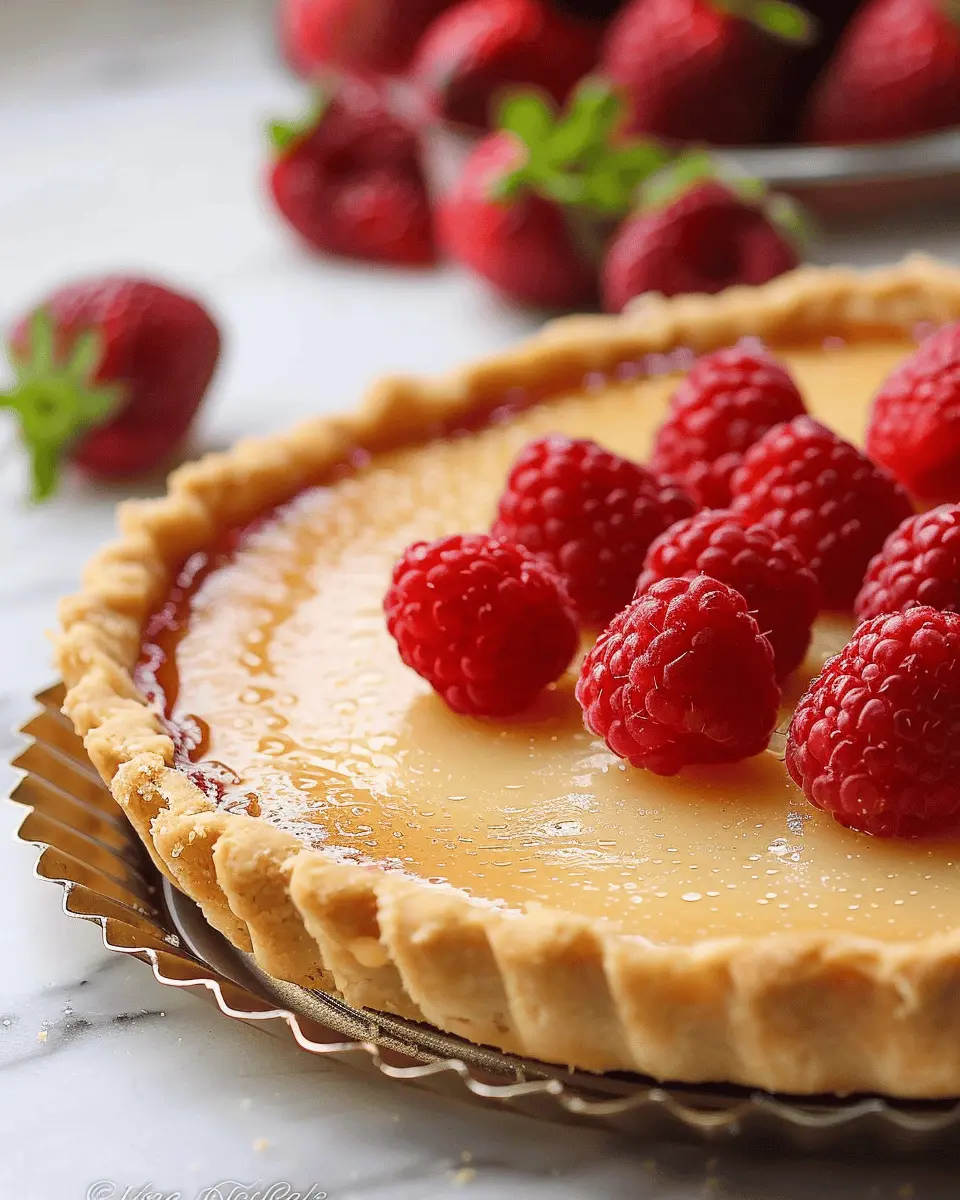
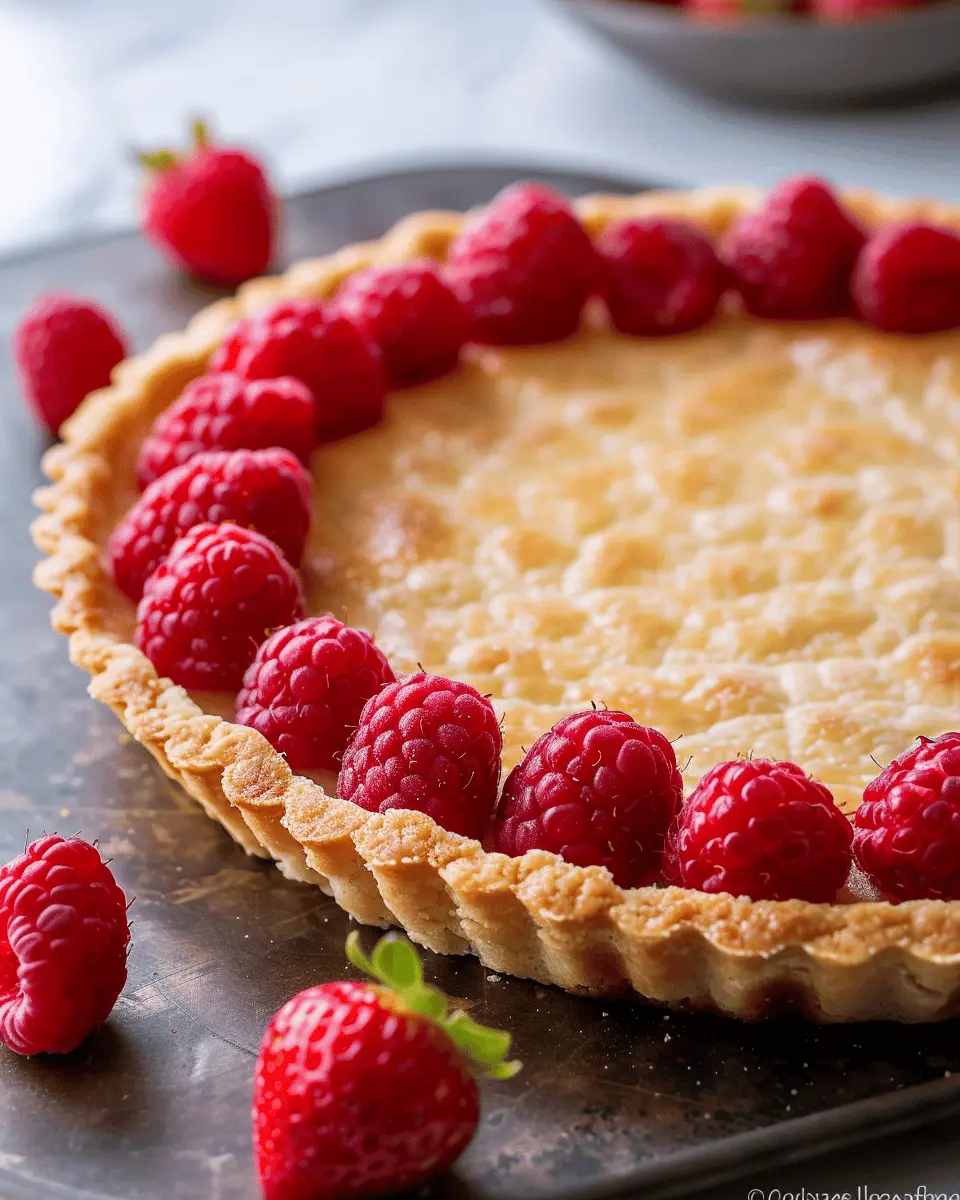
Baking the Crust to Golden Perfection
After chilling, roll out the dough on a lightly floured surface to about 1/8 inch thick. Carefully transfer the rolled-out crust to your tart pan or pie dish. Trim and flute the edges for an elegant finish.
Preheat your oven to 350°F. Before blind baking (which helps prevent a soggy bottom), poke some holes in the crust with a fork to allow steam to escape. Bake for about 20-25 minutes, or until golden brown. The smell of baking sweet tart crust is nothing short of irresistible!
Once baked, let it cool completely before filling it with your choice of deliciousness. Celebrate your baking achievement—you deserve it!
With a bit of patience and these clear steps, you’ll always have a go-to sweet tart crust on hand for all your dessert needs! For more tips and rich filling ideas, check out The Kitchn’s Tart Guide. Happy baking!
Variations on Sweet Tart Crust
If you’re looking to elevate your sweet tart crust, you’re in for a treat! Let’s dive into some enticing variations that add a personal twist to this classic recipe.
Gluten-Free Sweet Tart Crust Option
For those avoiding gluten, crafting a delicious sweet tart crust is entirely possible! Consider using almond flour or a gluten-free all-purpose mix. Here’s a simple guideline:
- Ingredients: Substitute regular flour with equal parts gluten-free flour or almond flour.
- Texture Tip: Almond flour often yields a nuttier flavor with a lovely crunch. However, you might want to add a touch of xanthan gum to help with binding.
This option is perfect for any gathering where dietary restrictions should not diminish the dessert experience.
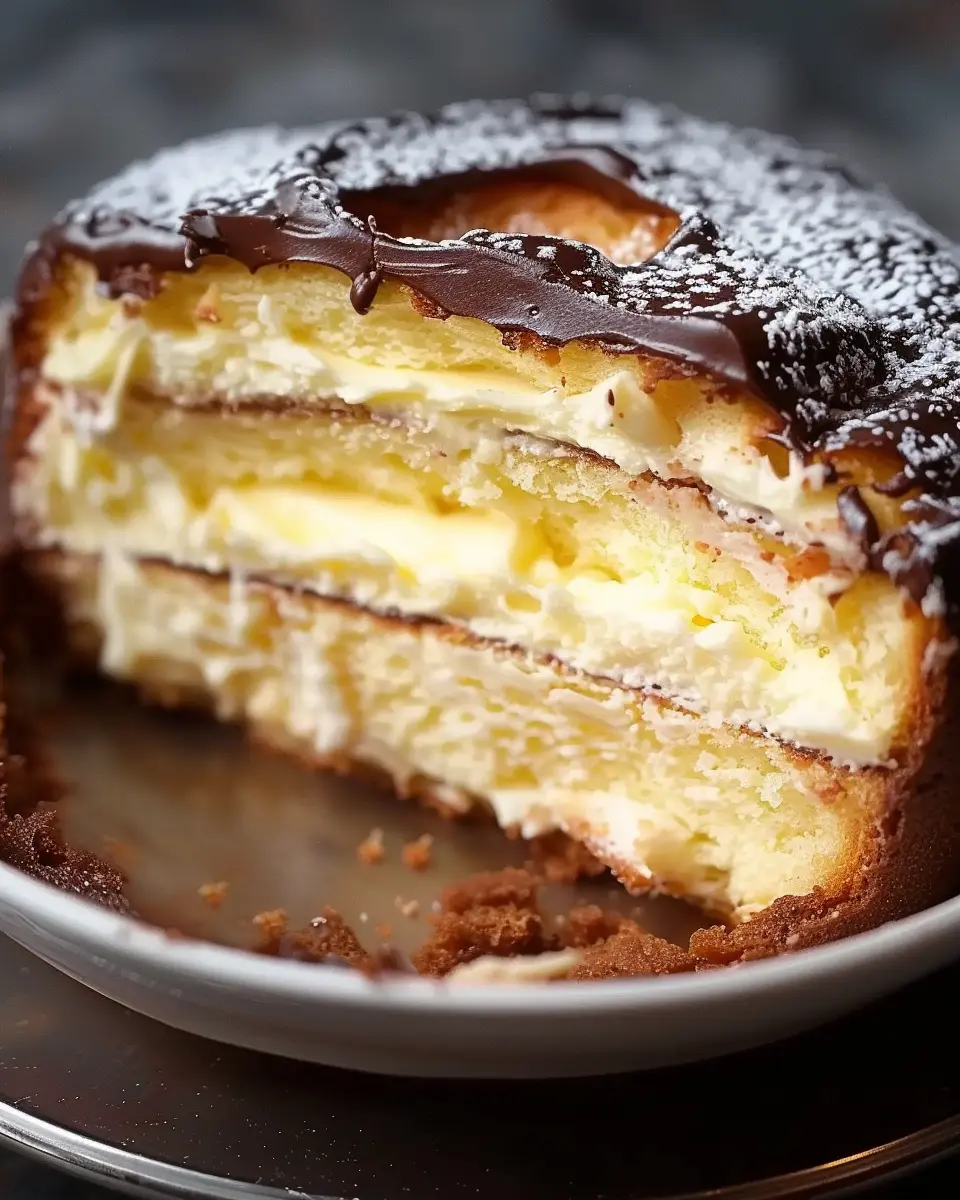
Chocolate Sweet Tart Crust for a Twist
Looking to impress your friends? A chocolate sweet tart crust could be your secret weapon.
- How to Make It: Simply blend cocoa powder into your crust mixture.
- Proportions: Use about 1/4 cup for a subtle chocolate flavor, or increase to 1/2 cup for a richer taste.
This variation pairs beautifully with fruit fillings or creamy fillings and adds a delightful depth to your tarts.
Using Different Extracts for Unique Flavors
Ever thought about flavoring your crust, too? A simple addition of extracts can transform your sweet tart crust into something special.
- Try These Extracts:
- Vanilla is a classic choice.
- Almond extract offers a lovely nutty undertone.
- Lemon extract can brighten your tarts perfectly.
Make experimenting with flavors a regular thing. You might just stumble upon your new favorite tart creation!
Incorporating these variations can help tailor your sweet tart crust to fit any occasion. From gluten-free options to adventurous flavors, there’s a pathway here for everyone to create the perfect tart. If you’re curious about more baking techniques, check out resources like King Arthur Baking for professional tips and tricks!
Cooking Tips and Notes for Sweet Tart Crust
Common pitfalls and how to avoid them
Making a sweet tart crust is an art, and there are a few common mistakes to watch out for. Overworking the dough can lead to a tough crust, so mix just until combined. If you notice cracks, don’t fret! Simply patch them up with a bit of dough. Be mindful of not adding too much flour during rolling; a light dusting is all you need to keep it manageable.
The importance of chilling the dough
Chilling your dough is not just a suggestion—it’s essential. Allowing the dough to rest in the fridge for at least 30 minutes helps it relax, preventing any shrinkage when baked. This step improves texture and makes it easier to roll out. If you’re short on time, an ice bath can help speed things up!
Tools that make the process easier
A few handy tools can elevate your sweet tart crust experience:
- Food Processor: Cuts down on mixing time and ensures even ingredient distribution.
- Rolling Pin with Guides: Helps you roll the dough to an even thickness.
- Parchment Paper: Perfect for lining your tart pan and makes cleanup a breeze.
Investing in these tools can simplify your baking journey. For more on choosing the right kitchen gadgets, check out Kitchen Safety. Happy baking!
Serving Suggestions for Sweet Tart Crust
Creating the perfect sweet tart crust is just the beginning! Now, the real fun comes in deciding how to fill it and present it. Let’s dive in!
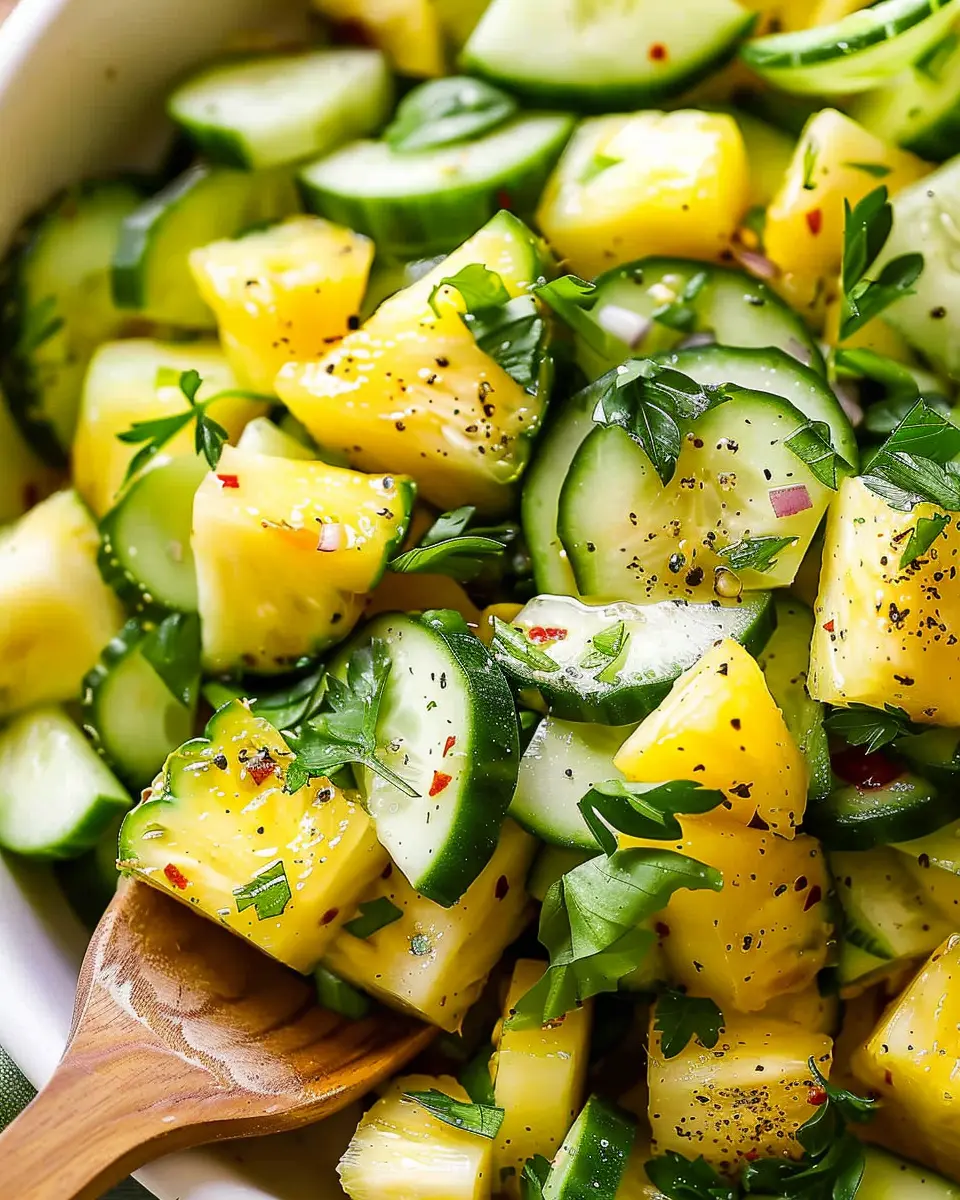
Creative fillings for your tart crust
When it comes to filling your sweet tart crust, the options are endless. Consider these exciting choices:
- Fruits: Think fresh seasonal berries, citrus segments, or even poached pears for that sweet-tart balance.
- Custards: A rich vanilla custard or a tangy lemon curd adds a delightful creamy texture.
- Chocolate Ganache: For chocoholics, a silky ganache topped with sea salt is pure indulgence.
Pairing options to elevate your dessert
To take your tart to another level, consider these delightful pairings:
- Cream: Serve with a dollop of homemade whipped cream or a scoop of vanilla ice cream.
- Nuts: Sprinkle toasted almonds or hazelnuts for added crunch and flavor.
Presentation ideas to impress friends and family
A sweet tart crust can truly shine when presented beautifully.
- Garnish: Use fresh mint leaves or edible flowers for a pop of color.
- Serving Plate: A decorative cake stand elevates the entire display.
- Slice: Serve individual mini tarts or slices, making it easy for guests to savor.
With these suggestions, your sweet tart crust will not just taste amazing but also look stunning on any table! For more creativity, check out these baking tips.
Time Breakdown for Sweet Tart Crust
Preparation time estimate
Making a sweet tart crust is pretty straightforward! You’ll want to allocate about 15-20 minutes for the preparation. This includes gathering your ingredients, mixing the dough, and rolling it out to fit your tart pan.
Chilling time estimate
To achieve the perfect flaky texture, don’t skip the chilling phase. Plan on 30 minutes in the fridge. This allows the gluten in the dough to relax, which is essential for that melt-in-your-mouth quality.
Baking time estimate
Once it’s chilled, your sweet tart crust will need about 15-20 minutes in the oven. Keep an eye on it—golden brown is the goal!
Total time needed for the recipe
All in, you’re looking at around 1 hour to whip up this delightful crust from start to finish. Perfect for your next dessert endeavor! Planning ahead? Check out more tips on making a beautiful tart crust at Baking 101.
Nutritional Facts for Sweet Tart Crust
Caloric Content per Slice
When indulging in a delicious sweet tart crust, understanding its caloric content can help keep your dessert experience balanced and enjoyable. A typical slice contains around 200 to 250 calories, depending on the recipe and serving size. This makes it a delightful treat without completely derailing your daily intake.
Key Nutritional Components
This delightful crust is not just about taste; it provides essential nutrients, too! Here are some key components:
- Carbohydrates: The primary energy source.
- Fats: Healthy fats can contribute to satiety and flavor, especially if you use butter or coconut oil.
- Vitamins and Minerals: Depending on the ingredients, a sweet tart crust can offer some vitamins and minerals, including calcium from dairy.
For a deeper insight into how ingredients matter for our health, check out resources from Healthline to explore the nutritional profiles of common baking ingredients.
Healthier Ingredient Alternatives
If you’re looking to make your sweet tart crust a bit healthier, consider these swaps:
- Whole Wheat Flour: Use this instead of all-purpose flour for added fiber.
- Coconut Oil or Avocado Oil: These can replace butter for a healthier fat option.
- Natural Sweeteners: Instead of refined sugar, try honey or maple syrup for a more wholesome sweetness.
Substituting ingredients can significantly boost the nutritional value of your dessert while still satisfying your sweet tooth. For more tips on healthy baking substitutions, head over to American Heart Association for excellent resources.
By being mindful of what goes into your sweet tart crust, you can delight in a delicious dessert that complements a balanced lifestyle!
FAQs about Sweet Tart Crust
Why did my crust shrink while baking?
Crust shrinkage is a common issue when making a sweet tart crust. This usually happens if the dough is overworked or not chilled enough before baking. When gluten develops too much during mixing, it can cause the dough to contract as it bakes. To prevent this, make sure to handle your dough gently and chill it for at least an hour before rolling it out. If you experience this issue, try blind baking at a lower temperature to help set the crust without allowing it to shrink further.
Can I make this dough ahead of time?
Absolutely! One of the great advantages of a sweet tart crust is that it can be made in advance. You can prepare the dough, wrap it tightly in plastic wrap, and refrigerate it for up to three days. Alternatively, you can freeze it for up to three months. Just remember to let it thaw in the refrigerator overnight before using it. This makes it super convenient for busy professionals who love to bake!
What can I do with leftover dough?
If you have leftover dough, don’t toss it out! You can roll it out for cute little tartlets or cookies. Bake them separately, and you’ll have delicious treats for snack time. Alternatively, you could freeze any extra dough for future use—just wrap it well and label it. This way, you’ll always have a homemade crust ready for your next dessert.
How do I store my baked tart crust?
To store your baked sweet tart crust, let it cool completely, then wrap it tightly in plastic wrap or aluminum foil. Store it at room temperature for up to two days or in the refrigerator for about a week. If you need to keep it longer, consider freezing it for up to two months. Just remember to thaw it at room temperature before serving; enjoy the delicious results of your baking efforts!
For more baking tips and techniques, consider checking out resources from The Baking Explorer or Serious Eats.
Conclusion on Sweet Tart Crust
Recap the Joy of Making Your Own Tart Crust
There’s something truly rewarding about creating your own sweet tart crust. From the moment you blend the ingredients to that first satisfying bite, the experience is both delightful and fulfilling. Homemade crusts not only taste better but also allow you to control the quality of the ingredients.
Encouragement to Experiment with Flavors and Fillings
Don’t be afraid to get creative! Try different flavors and fillings that resonate with your taste buds—think fresh fruits, creamy custards, or even rich chocolate ganache. Each twist can transform your dessert into something uniquely yours.
Inviting Readers to Share Their Creations and Experiences
I’d love to hear about your adventures in making sweet tart crust! Please share your creations and any tips you’ve picked up along the way in the comments. You might inspire someone else’s culinary journey. Happy baking!
For additional resources on baking techniques, check out The Kitchn or Serious Eats for great tips and tricks.
PrintSweet Tart Crust: Your Easy Guide to Perfecting Homemade Flavors

Master the art of creating a delicious sweet tart crust with this easy guide. Perfect for any dessert!
- Prep Time: 15 minutes
- Cook Time: 25 minutes
- Total Time: 40 minutes
- Yield: 1 tart 1x
- Category: Dessert
- Method: Baking
- Cuisine: French
- Diet: Vegetarian
Ingredients
- 1 ½ cups all-purpose flour
- ½ cup unsalted butter, softened
- ½ cup powdered sugar
- 1 egg yolk
- ¼ teaspoon salt
Instructions
- Preheat your oven to 350°F (175°C).
- In a mixing bowl, cream together the softened butter and powdered sugar until smooth.
- Add the egg yolk and mix until combined.
- Stir in the flour and salt until the dough forms.
- Press the dough into a tart pan evenly and prick the bottom with a fork.
- Bake for 20-25 minutes or until lightly golden.
- Let cool before filling.
Notes
- Chill the crust before baking for a sturdier texture.
- Experiment with adding vanilla or lemon zest for extra flavor.
Nutrition
- Serving Size: 1 slice
- Calories: 200
- Sugar: 5g
- Sodium: 50mg
- Fat: 12g
- Saturated Fat: 7g
- Unsaturated Fat: 4g
- Trans Fat: 0g
- Carbohydrates: 22g
- Fiber: 1g
- Protein: 2g
- Cholesterol: 30mg
Keywords: Sweet Tart Crust, tart recipe, homemade tart