Introduction to Stained Glass Window Cookies
What are Stained Glass Window Cookies?
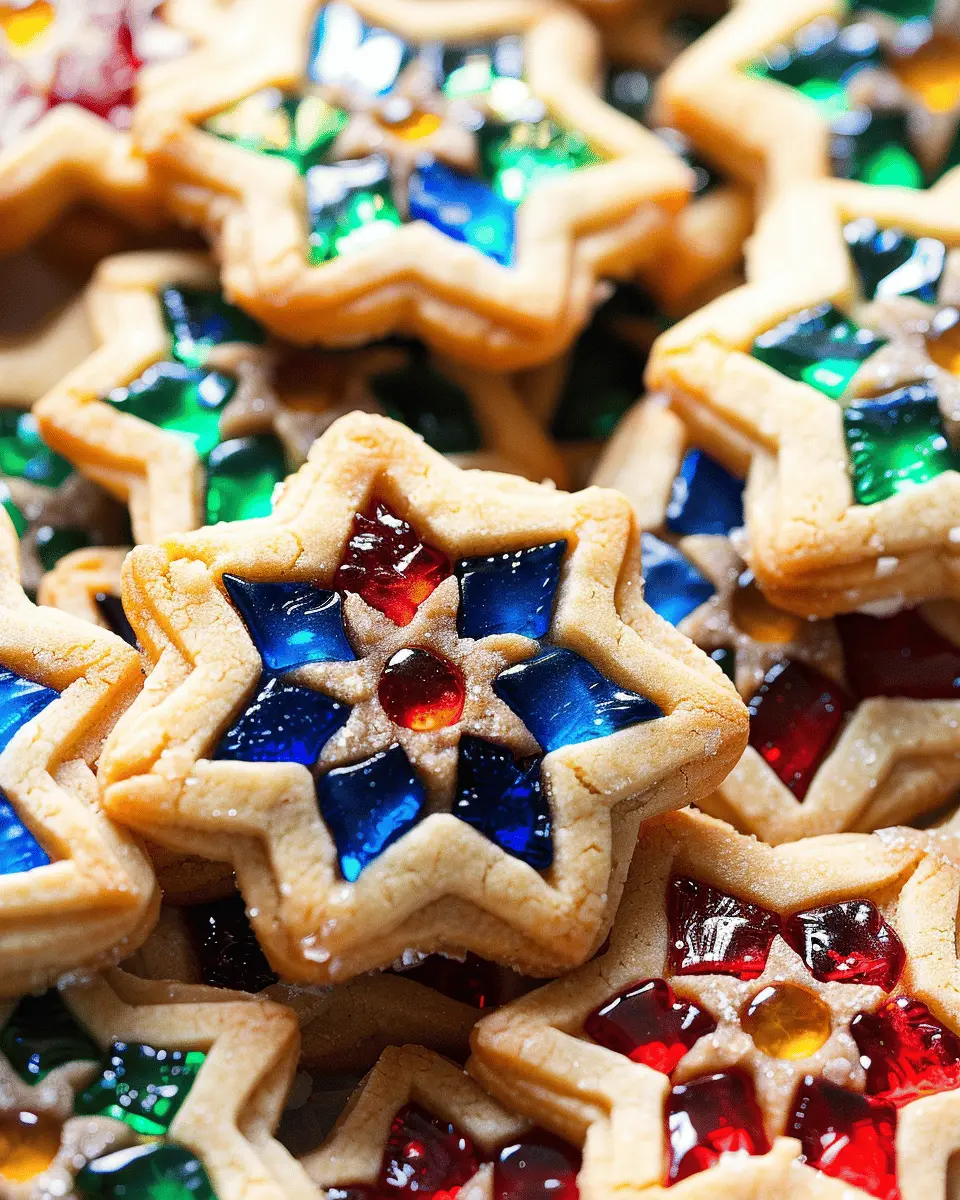
Stained Glass Window Cookies are a delightful twist on traditional sugar cookies. They are not just visually stunning; they combine the sweetness of a cookie with the beautiful colors of hard candy. When baked, the candy melts to create a window-like effect, inviting anyone who sees them to take a bite. Imagine a platter of these glittering treats at your next gathering, captivating your guests with their vibrant hues and unique charm.
If you want to dive deeper into the fascinating art of cookie baking, check out this guide to baking perfect cookies for tips from the experts!
Why You Should Make Them
There’s a multitude of reasons to whip up a batch of stained glass window cookies:
- Visual Appeal: Their vibrant colors can brighten up any occasion, making them perfect for parties, holidays, or simply as a charming dessert to enjoy at home.
- Creative Expression: Decorating these cookies with different shapes and colors allows you to let your imagination run wild! You can customize them for any holiday or theme.
- Engaging Activity: This recipe is a fun way to bond with friends or family, especially if you involve them in the decorating process. It’s great for kids and adults alike!
These cookies are not just about taste but also an opportunity to showcase your personality and creativity.
Personal Anecdote: My First Attempt
I still remember my first attempt at making stained glass window cookies—it was a disaster turned delectable. I was determined to impress my friends at a gathering, so I set up my kitchen with rainbow-colored candies and cookie dough ready. As I placed them in the oven, the sweet smell enveloped the whole house. However, I realized too late that I had been overly generous with the candy!
When I pulled them out, I was met with a gooey mess that had spread across the baking sheet. While it wasn’t exactly what I had envisioned, the taste was surprisingly good, and my friends couldn’t stop laughing and enjoying the treat. It was a whimsical adventure that I still cherish today—proof that even cooking mishaps can lead to something memorable!
So, if you’re ready to embark on your own stained glass cookie adventure, grab your ingredients and let’s get baking!
Ingredients for Stained Glass Window Cookies
Creating beautiful stained glass window cookies involves a few essential ingredients that come together to deliver a delightful treat. Let’s break down what you’ll need!
Essential baking ingredients
To make these charming cookies, you’ll need some basics that you likely already have in your pantry:
- All-purpose flour: The foundation of any cookie dough.
- Granulated sugar: Adds sweetness and tenderness.
- Butter: Unsalted is best for a more controlled flavor.
- Egg: Helps bind everything together.
- Baking powder: This will give your cookies a nice lift.
- Salt: A small amount enhances the overall flavor.
- Vanilla extract: For that warm, classic cookie taste.
If you’re curious about the science behind baking, you might check out sources like King Arthur Baking for informative resources.
Hard candies for the stained glass effect
The star of the show—those glowing stained glass windows—are created using hard candies. Here’s what to grab:
- Life Savers or Jolly Ranchers: These are excellent choices due to their vibrant colors and solid structure when baked.
- Crushed candies: You can crush them into smaller pieces for a better stained glass effect.
Choosing the right colors can create stunning visual appeal. So, get creative and mix and match to achieve that breathtaking stained glass effect in your cookies!
Now that you have your ingredients ready, let’s dive right into making these delectable treats.
Preparing Stained Glass Window Cookies
Making stained glass window cookies isn’t just a fun baking project; it’s a creative way to add a splash of color to your holiday table or any special occasion. Plus, they make a lovely gift! Let’s walk through the steps to create these delightful treats together.
Gather Your Ingredients
Start by assembling all the necessary ingredients. Here’s what you’ll need:
-
For the cookie dough:
-
2 ¾ cups all-purpose flour
-
1 teaspoon baking powder
-
½ teaspoon salt
-
1 cup unsalted butter, softened
-
1 cup granulated sugar
-
1 large egg
-
1 teaspoon vanilla extract
-
For the “stained glass”:
-
Assorted hard candies (like Jolly Ranchers or Life Savers)
Having everything out and ready will make the process smoother and more enjoyable!
Mix the Dry Ingredients
In a medium-sized bowl, whisk together the flour, baking powder, and salt. Mixing these dry ingredients first ensures that the baking powder is evenly distributed, which is essential for achieving that perfect cookie texture. You want that light, airy bite when you sink your teeth into them!
Cream the Butter and Sugar
In a large mixing bowl, beat the butter and sugar together until the mixture is light and fluffy. This process typically takes about 3-5 minutes using an electric mixer. The butter-sugar combo is where the magic begins, as it aerates the batter, leading to deliciously soft cookies.
Combine Dry and Wet Ingredients
Once your butter and sugar are ready, add in the egg and vanilla extract, mixing until just combined. Gradually add your dry mixture into the wet ingredients, stirring until a smooth dough forms. At this point, it might be a good time to preheat your oven to 350°F (175°C) so it’s ready for you later!
Roll Out and Chill the Dough
With your dough ready, turn it out onto a floured surface. Roll it out to about ¼-inch thickness. Here’s a pro tip: if you find the dough is sticky, popping it into the fridge for 20-30 minutes can make it easier to handle. Chilling your dough also helps prevent the cookies from spreading too much in the oven.
Prepare the Hard Candies
While your dough is chilling, it’s time to prepare the hard candies. Unwrap your chosen candies and place them in a plastic bag. Use a rolling pin or meat mallet to gently crush them into small, uniform pieces. This step is crucial since the size of the candy chunks will determine how they melt and create that beautiful stained glass effect.
Cut Out Cookies and Fill Centers
Once your dough is chilled, use cookie cutters to cut out shapes. Make sure to also cut out smaller shapes from the center of each cookie to fill with your crushed candies. Don’t forget to place your cookies on a parchment-lined baking sheet, leaving plenty of space in between.
Bake to Perfection
Pop your cookies in the oven and bake for about 10-12 minutes, or until the edges are lightly golden. The real magic happens as the hard candies melt in the center, creating that stunning stained glass look. Don’t stray too far from the oven during this time—you’ll want to watch the enchanting transformation!
Cool and Set
Once baked, remove your cookies from the oven and allow them to cool completely on the baking sheet for about 5-10 minutes. This cooling process is vital as the melted candies need a bit of time to set, ensuring a lovely, glossy finish.
And there you have it! Now you’re all set with your stained glass window cookies. They’re not just beautiful but also a treat that will surely impress friends and family alike. Happy baking!
Variations on Stained Glass Window Cookies
Stained glass window cookies are a delightful treat, and there are so many ways to customize them! Let’s explore some fun and creative variations that will take your baking to the next level.
Colorful holiday-themed options
Why not turn your stained glass window cookies into festive decorations? During the holiday season, consider using red and green candies for Christmas or pastel colors for Easter. You can even shape the cookies into holiday symbols, such as trees, stars, or eggs, to enhance the theme. It’s a great way to share personal touches and make those gatherings even more special!
Alternative candy choices
While classic hard candies like Jolly Ranchers are an excellent choice for filling in the “windows,” you can experiment with different candies to find your favorite combination. Try gummy candies for a chewier texture or fruit-flavored lollipops for a burst of unexpected flavor. The key is to use candies that melt well and create beautiful colors. Remember, the idea is to have fun — so don’t be afraid to mix and match!
Gluten-free adaptations
For those with gluten sensitivities, it’s entirely possible to enjoy stained glass window cookies without sacrificing flavor. Look for gluten-free flour blends that work well in cookie recipes, and ensure that the candies you choose are also gluten-free. These simple adjustments mean that everyone can join in on the fun. For more gluten-free baking tips, visit the Gluten-Free Baking Coach.
By embracing these variations, your stained glass window cookies will not only taste amazing but also become unique pieces of art!
Cooking tips and notes for Stained Glass Window Cookies
Tackling common baking challenges
Baking stained glass window cookies can be a delightful adventure, but it’s not without its hurdles. If the dough feels overly sticky, a little extra flour can do wonders. It’s also essential to chill the dough for at least an hour to avoid spreading, ensuring those intricate shapes maintain their form while baking. When melting the hard candies for the filling, keep an eye on the temperature to prevent burning—use a trusted candy thermometer for an accurate read.
Tools you’ll need
Having the right tools makes all the difference when crafting these stunning cookies:
- Rolling pin: For even dough thickness.
- Cookie cutters: Choose your shapes wisely; think festive or thematic!
- Baking sheets: Opt for non-stick types or line with parchment paper.
- Piping bags: Handy for those intricate candy fillings.
Before you dive in, make sure you’re prepared with these essentials. Happy baking! For some inspiration on cookie decorating techniques, check out this resource.
Serving suggestions for Stained Glass Window Cookies
Perfect pairings with drinks
When serving stained glass window cookies, the right drink can elevate your treat from delightful to divine. Consider these refreshing options:
- Herbal tea: A warm cup of chamomile or peppermint balances out the sweet flavors beautifully. Not only does it add to the cozy atmosphere, but the herbal notes also provide a refreshing contrast.
- Sparkling water: Add a slice of lemon or a few fresh mint leaves for a zesty touch. This bubbly, hydrating option allows the cookies’ sweetness to shine without overwhelming the palate.
- Milk alternatives: Almond or oat milk offer a dairy-free choice that pairs well with the vibrant colors of the cookies.
Creative presentation ideas
The visual impact of your stained glass window cookies is half the joy! Try these engaging presentation ideas:
- Cookie platters: Arrange these colorful treats on a large platter or tiered cake stand, mixing in some edible flowers or seasonal fruits for an eye-catching display.
- Gift jars: Layer cookies in glass jars and tie them with a ribbon for a charming, homemade gift. They make wonderful surprises for friends or colleagues.
- Themed parties: Set up a cookie decorating station at a gathering where guests can create their own versions, making the experience interactive and enjoyable.
By considering these pairings and presentation styles, you’ll not only impress your guests but also create memorable moments centered around your beautiful stained glass window cookies. For more creative ideas, check out this guide on event planning for inspiration!
Time Breakdown for Stained Glass Window Cookies
Creating your own stained glass window cookies can be a delightful experience! Here’s a quick breakdown of the time you’ll need to whip up these colorful treats, ensuring you plan your baking session smoothly.
Preparation Time
You’ll need about 30 minutes to gather your ingredients and mix, roll out the dough, and cut out your cookie shapes. Make sure to have your favorite festive cookie cutters ready!
Chilling Time
Once you’ve shaped your cookies, allow them to chill in the refrigerator for 1 hour. This step is vital, as it keeps your cookies from spreading too much while baking and helps maintain their beautiful shapes.
Baking and Cooling Time
Baking your stained glass window cookies will take approximately 10-12 minutes. After baking, give them a chance to cool completely for at least 20 minutes. This way, the candy center has time to harden, resulting in that stunning “stained glass” effect.
Feel free to check out this guide on cookie baking tips for more insights! Happy baking!
Nutritional Facts for Stained Glass Window Cookies
When it comes to indulging in stained glass window cookies, it’s helpful to know what you’re treating yourself to. Here’s a quick breakdown of their nutritional content.
Approximate Calories Per Cookie
Each stained glass window cookie comes in at approximately 100 calories. This makes them a delightful treat that’s easy to fit into your daily caloric goals, whether you’re enjoying a couple with your afternoon coffee or sharing them at a social gathering.
Sugar Content Per Serving
A typical cookie contains about 8 grams of sugar. While these cookies are undeniably sweet, you can experiment with reducing the sugar or using natural sweeteners if you’re looking to cut back. Just remember, sugar not only adds sweetness but also contributes to that delightful, chewy texture!
For more insights on managing sugar intake in your diet, consider checking out resources from the American Heart Association or Harvard Health.
FAQs about Stained Glass Window Cookies
When it comes to making stained glass window cookies, you might have a few questions bubbling up. No worries! Let’s tackle some common queries that many home bakers have.
Can I use different shapes and sizes for the cookies?
Absolutely! The beauty of stained glass window cookies lies in their versatility. You can use any cookie cutter shape—hearts, stars, or even trees—for a festive touch. Just keep in mind that the baking time may vary slightly depending on the size. Smaller cookies will bake quicker, so keep an eye on them to ensure they don’t overcook.
How can I store leftover cookies?
To keep your stained glass window cookies fresh, store them in an airtight container at room temperature. They can last for up to a week. If you’re looking to keep them longer, consider freezing them. Just layer the cookies with parchment paper and place them in a freezer-safe container. When you’re ready to enjoy them again, let them thaw at room temperature for a delightful treat!
What should I do if the candy melts overflow?
If you find that the candy melts overflow, don’t fret! Let the cookies cool down for a few minutes once you take them out of the oven. Then, you can use a toothpick or a small knife to carefully remove any excess melted candy around the edges. Just make sure to do this while the candy is still warm—once it sets, it will be much harder to clean up.
For more tips and tricks on baking, you can check out resources like The Kitchn or BBC Good Food. Happy baking!
Conclusion on Stained Glass Window Cookies
Encouragement to Try the Recipe
If you’re looking for a fun, visually stunning treat that’s perfect for any occasion, I wholeheartedly encourage you to try making stained glass window cookies. The colorful candy centers are not only gorgeous but also delicious, making this treat a guaranteed hit at gatherings or simply as a weekend project.
Final Thoughts on Homemade Treats
Homemade treats like these cookies bring a personal touch that store-bought goodies can’t match. Creating your own stained glass window cookies allows you to experiment with flavors and shapes, expressing creativity in your kitchen. Plus, there’s something remarkably satisfying about sharing your own creations with family and friends. So gather your ingredients, roll up your sleeves, and indulge in the joy of baking! For additional insights on baking techniques, check out resources like the King Arthur Baking Company.
PrintStained Glass Window Cookies: Easy, Colorful Treats to Delight

Stained Glass Window Cookies are a delightful treat that combines beautiful colors with a sweet flavor.
- Prep Time: 20 minutes
- Cook Time: 10 minutes
- Total Time: 30 minutes
- Yield: 24 cookies 1x
- Category: Dessert
- Method: Baking
- Cuisine: American
- Diet: Vegetarian
Ingredients
- 2 1/2 cups all-purpose flour
- 1 teaspoon baking powder
- 1/2 teaspoon salt
- 1 cup unsalted butter, softened
- 1 cup granulated sugar
- 1 large egg
- 1 teaspoon vanilla extract
- 1 cup crushed hard candies (various colors)
Instructions
- Preheat the oven to 350°F (175°C).
- In a bowl, mix flour, baking powder, and salt.
- In another bowl, cream together butter and sugar until smooth.
- Add the egg and vanilla, and beat well.
- Gradually add flour mixture and mix until combined.
- Roll out dough and cut into desired shapes.
- Cut out centers and fill with crushed candies.
- Bake for 8-10 minutes or until edges start to brown.
- Cool before serving.
Notes
- For more vibrant colors, use a variety of hard candies.
- Adjust baking time based on cookie size.
Nutrition
- Serving Size: 1 cookie
- Calories: 100
- Sugar: 8g
- Sodium: 50mg
- Fat: 6g
- Saturated Fat: 4g
- Unsaturated Fat: 2g
- Trans Fat: 0g
- Carbohydrates: 10g
- Fiber: 0g
- Protein: 1g
- Cholesterol: 20mg
Keywords: Stained Glass Window Cookies, cookies, colorful cookies, holiday treats