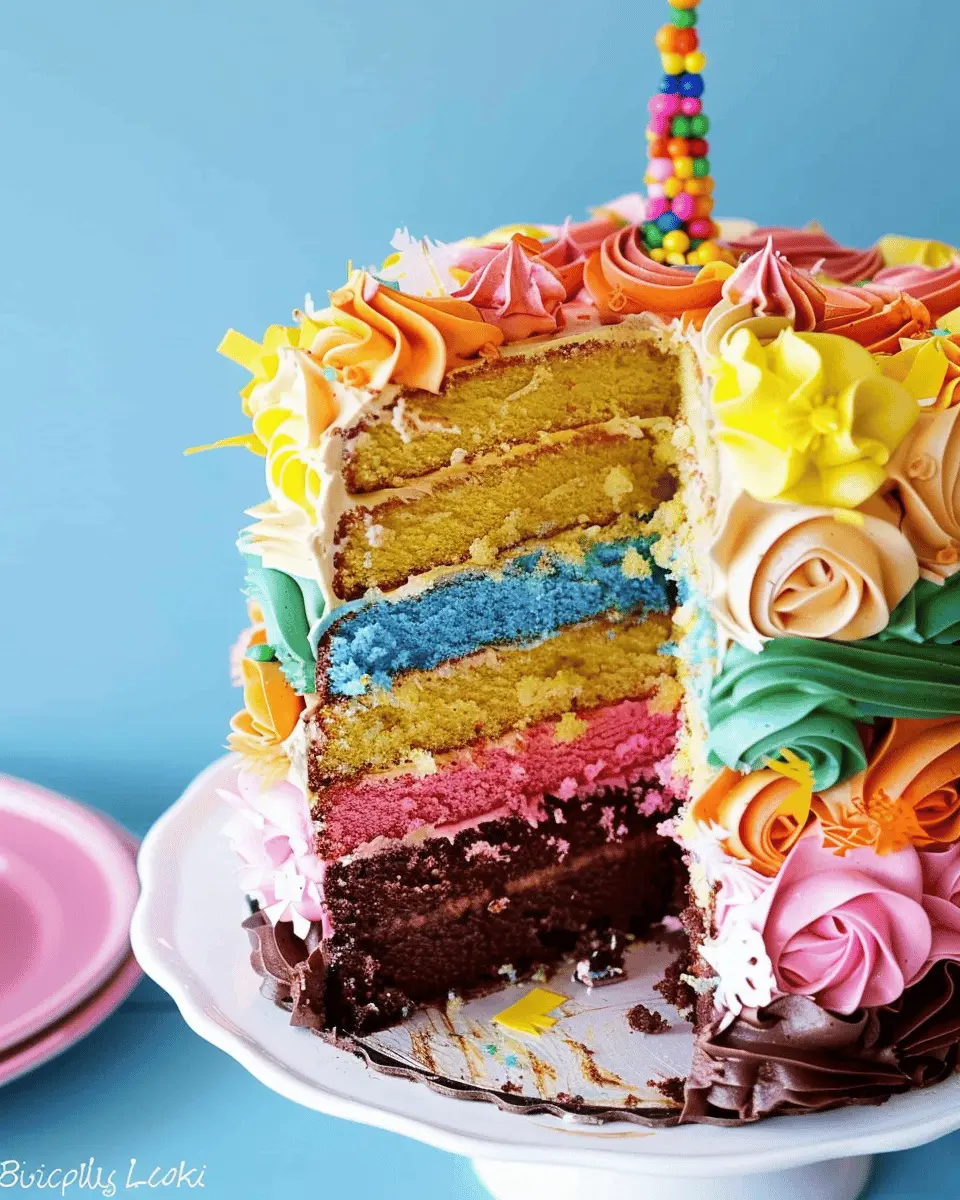
The Magical Appeal of Piñata Cakes
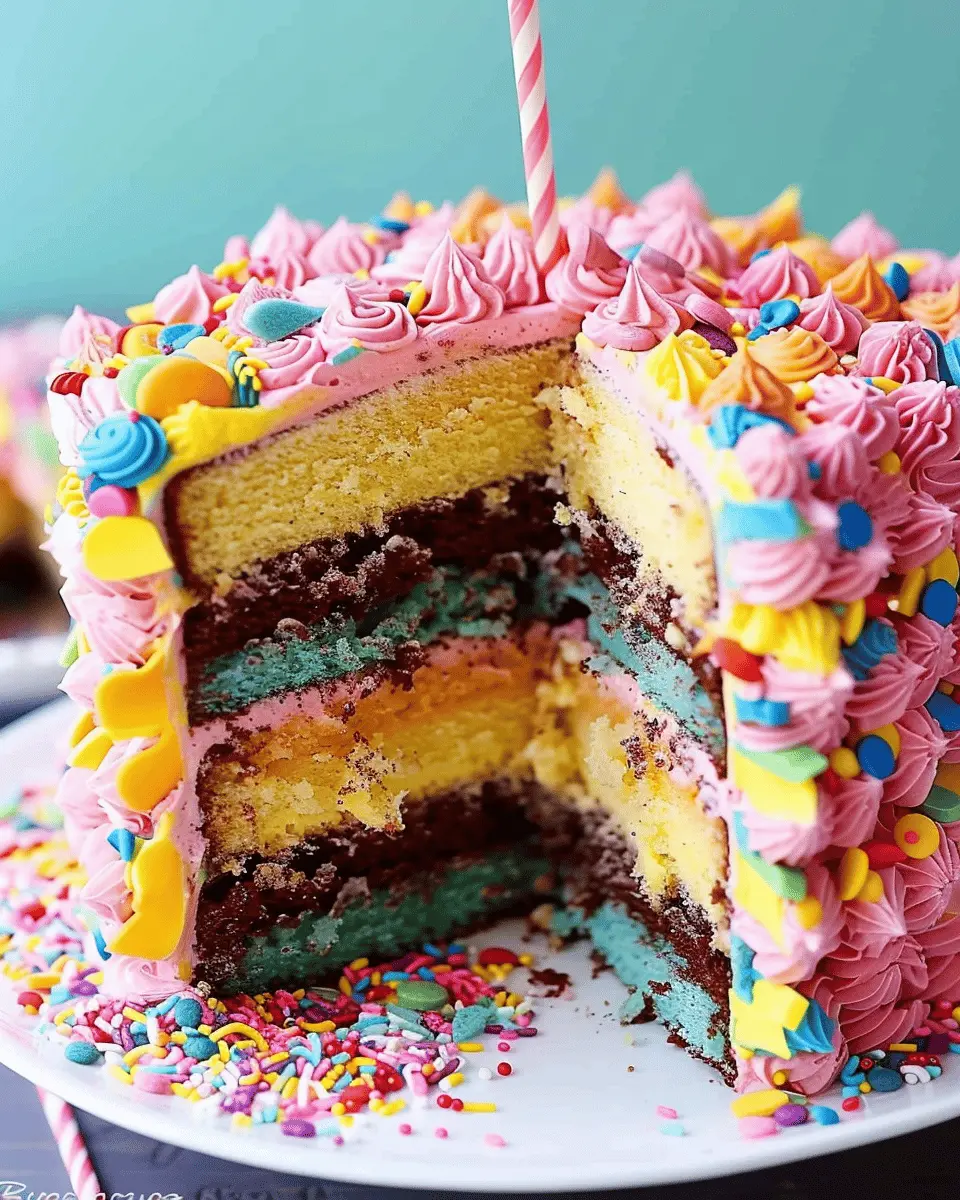
You might be wondering, how to make a piñata cake? Well, let me introduce you to a cake that’s as much fun to make as it is to eat. The piñata cake brings a delightful twist to ordinary celebrations by hiding surprises inside. Imagine slicing through a beautifully decorated cake, only to have a cascade of colorful candies burst out. It’s pure joy, and it never fails to elicit smiles from everyone at the party.
What makes these cakes so enchanting is their versatility. You can fill them with your favorite confections, from chocolate candies to gummy bears, giving each cake a personal touch. Plus, they look fantastic on display—who wouldn’t want to cut into a cake that’s a feast for the eyes as well as the stomach?
Choosing Your Base Cake
To begin your piñata journey, select a cake base that pairs well with your fillings. Classic vanilla or chocolate cake works wonderfully here, but feel free to get creative. Choose a recipe that resonates with your taste—if you fancy something unique, a lemon or red velvet option could be quite a hit!
Crafting the Perfect Filling
When you’re ready to make a piñata cake, consider your filling options. Here are some favorites:
- Chocolate Bars: Mini Snickers or Reese’s for a rich surprise.
- Gummy Candies: Great for adding a fun, chewy texture.
- Sprinkles or M&M’s: Ideal for a colorful explosion.
Baking Techniques and Tips
As you prepare your cakes, remember a few key baking tips:
- Use quality ingredients; they make a difference in taste and texture.
- Ensure even baking by rotating your cake pans halfway through. For more insights on baking techniques, check out this baking guide.
Once baked and cooled, hollow out the center of your cakes carefully. This is the magical moment—fill it generously with your delightful treasures and seal it back up. Then, frost your cake for that beautiful, finished look.
The ultimate reward comes when you unveil your piñata masterpiece. It’s not just dessert; it’s an experience that adds excitement to any gathering. So, roll up your sleeves, gather your friends and family, and make some delicious memories with this delightful treat!
For more recipes and inspiration, check out this resource for nifty ideas and tricks.
Ingredients for Piñata Cake
Creating a delightful piñata cake is all about using the right ingredients. Here’s what you’ll need to bring your cake to life!
Core Cake Ingredients
To get started on how to make a piñata cake, focus on these essentials:
- All-purpose flour: 2 cups, sifted
- Granulated sugar: 1.5 cups for that sweet touch
- Butter: 1 cup, softened (feel free to use unsalted!)
- Large eggs: 4, to create a rich texture
- Baking powder: 1 tablespoon, for that perfect rise
- Milk: 1 cup, to ensure moistness
- Vanilla extract: 2 teaspoons for flavor
Chocolate Frosting Ingredients
No piñata cake is complete without a luscious layer of frosting:
- Unsweetened cocoa powder: 2/3 cup for that rich chocolate flavor
- Confectioners’ sugar: 3 cups for sweetness
- Butter: 1/2 cup, softened
- Heavy cream: 1/4 cup, for a creamy consistency
- Vanilla extract: 1 teaspoon for warmth
Optional Decorations
Get creative with your cake design! Here are some fun ideas:
- Sprinkles: Choose your favorite colors to add to that festive look
- Edible glitter: A touch of sparkle never hurts!
- Fruit: Fresh berries or candied fruit can add color and texture
- Chocolate chips: Perfect for a chocolate lover’s twist
With these ingredients in hand, you’re ready to embark on the fun journey of making your piñata cake! It’s an exciting project that’s bound to impress your friends and family. For more baking tips, check out this resource from Baking Tips 101 to elevate your baking game even further. Happy baking!
Step-by-Step Preparation of Piñata Cake
Making a piñata cake is as much about the fun surprise inside as it is about the delicious layers of cake. This guide will take you through each step, making the process engaging and enjoyable. Let’s get started!
Gather and Prepare Your Baking Materials
Before diving into baking, preparation is key. Here’s a checklist to ensure you have everything you need:
-
Ingredients:
-
Flour, sugar, baking powder, baking soda, salt
-
Unsalted butter, eggs, vanilla extract
-
Buttermilk
-
Chocolate for frosting (dark or milk chocolate, your choice)
-
Tools:
-
Mixing bowls
-
Electric mixer or whisk
-
Measuring cups and spoons
-
Cake pans (two 9-inch round pans)
-
Sifter
-
Cooling rack
Having these materials ready will keep the process smooth, so check off each item as you prepare.
Whisk Together Dry Ingredients
In one bowl, begin by combining your dry ingredients. This will typically include:
- 2 cups all-purpose flour
- 1 ½ cups granulated sugar
- 1 tablespoon baking powder
- ½ teaspoon baking soda
- ½ teaspoon salt
Using a whisk, sift these together until they are well mixed. This step is essential as it helps to aerate the flour and evenly distribute the baking powder, ensuring a fluffy texture in your piñata cake.
Cream the Butter and Sugar
In a separate mixing bowl, cream together 1 cup of softened unsalted butter and the sugar mixture using an electric mixer. Beat until the mixture is light and fluffy, about 3-4 minutes. This process incorporates air and gives your cake that coveted lightness. Pro tip: Make sure your butter is at room temperature for the best results—it’s a game-changer!
Mix in Eggs and Vanilla
Once your butter and sugar are creamed, add in three large eggs, one at a time, mixing thoroughly after each addition. Then, add in 2 teaspoons of vanilla extract. The vanilla will not only enhance the flavor but will also make your kitchen smell delightful.
Combine Dry Ingredients with Buttermilk
To your creamed mixture, alternate adding the dry ingredients and 1 cup of buttermilk. Start and finish with the dry ingredients to keep everything uniform. Mix until just combined—overmixing can lead to a dense cake.
Bake the Cake Layers
Preheat your oven to 350°F (175°C). Grease your cake pans with butter or cooking spray and pour the batter evenly into each pan. Bake for 25-30 minutes or until a toothpick inserted into the center comes out clean.
Cool the Cake Layers Completely
Once baked, take the cake out of the oven and let it cool in the pans for about 10 minutes. After that, transfer the cakes to a cooling rack. It’s important to let them cool completely before decorating.
Make the Chocolate Frosting
While your cake layers are cooling, it’s time to whip up a simple chocolate frosting. Start with 1 cup of softened butter, blend it until creamy, then gradually mix in 3-4 cups of powdered sugar and ½ cup of cocoa powder. Add a splash of milk (or heavy cream) until you reach your desired consistency. This fluffy frosting is what will hold your piñata cake together!
Cut Holes into Cake Layers
Now for the fun part! Take one of your cooled cake layers and, using a round cutter, cut a circle in the center. Make sure to keep the cut-out piece, as it will help close the cake later. This hole is where you will add your surprise treats!
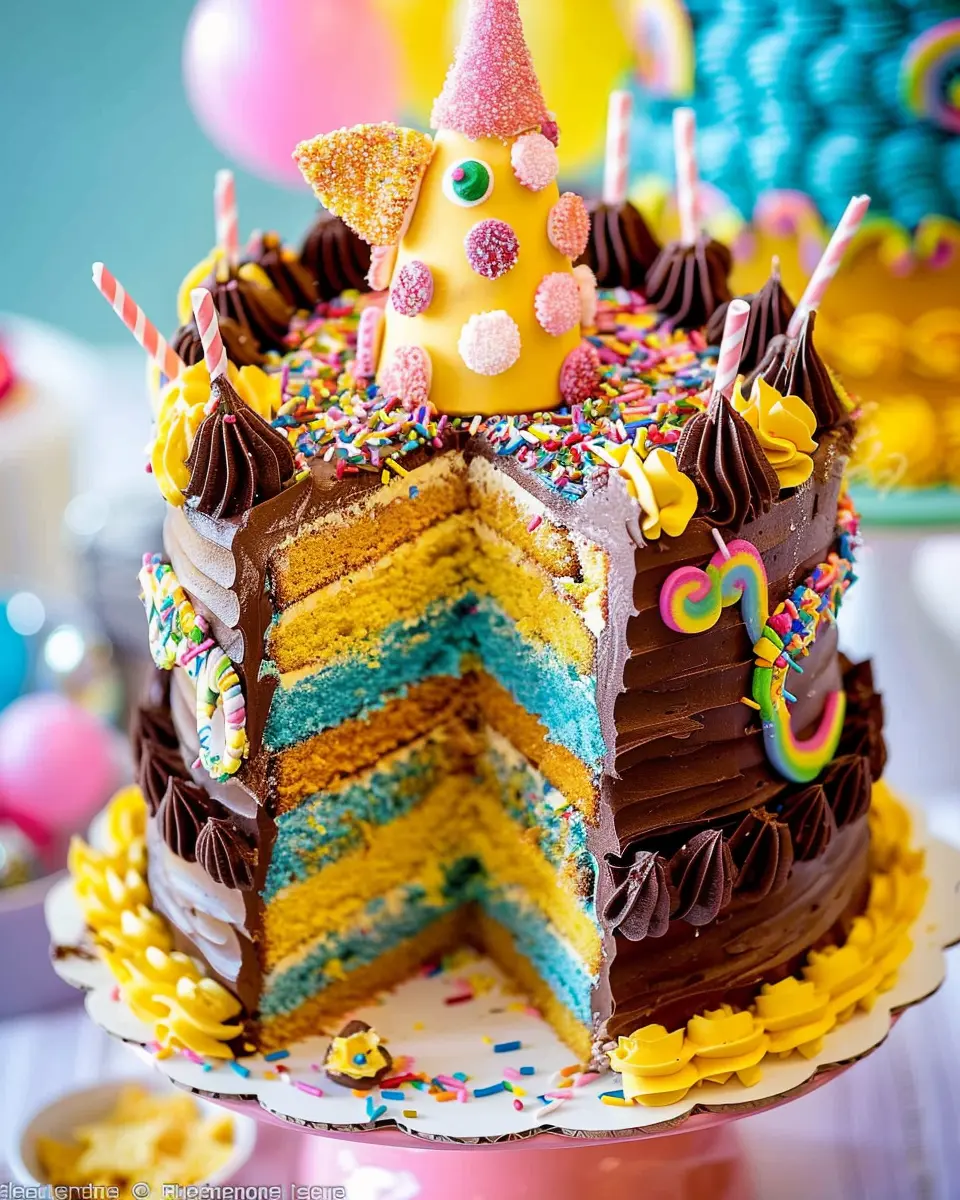
Assemble and Frost the Piñata Cake
To assembly your cake, place one layer on a serving plate, fill the center with candies or sprinkles, and then gently press the cut-out piece back on top. Add the second layer on top and frost the entire cake with your chocolate frosting. Get creative here—smooth it, swirl it, or add sprinkles for that festive touch!
And there you have it! This step-by-step process on how to make a piñata cake will surely impress your friends and family. Happy baking! For more cake inspiration, check out BAKING magazine.
Variations on Piñata Cake
Creating a piñata cake is an exciting way to surprise your guests, especially when you explore various creative twists on this delightful treat! Here are some ideas to help you customize your piñata cake experience.
Alternate fillings for the piñata effect
While classic candies like M&M’s or confetti sprinkles are always a hit, why not get adventurous? Consider using:
- Mini marshmallows for a fluffy texture.
- Fresh fruit like strawberries or berries for a burst of freshness.
- Chocolate-covered nuts for a crunchy surprise.
- Edible glitter to add a pop of sparkle.
By altering your fillings, you can cater to different tastes and add a unique charm to your piñata cake.
Different flavors for the cake and frosting
When it comes to how to make a piñata cake, think beyond vanilla. Try using:
- Cake flavors: Red velvet, lemon, or chocolate for different palettes.
- Frosting options: Cream cheese, buttercream, or even whipped cream for lighter toppings.
Mixing flavors not only elevates the experience but also allows you to tap into seasonal ingredients. Imagine a pumpkin spice piñata cake for autumn celebrations!
Decorating ideas for themed occasions
Your piñata cake can easily fit any occasion! Here are some fun decorating tips:
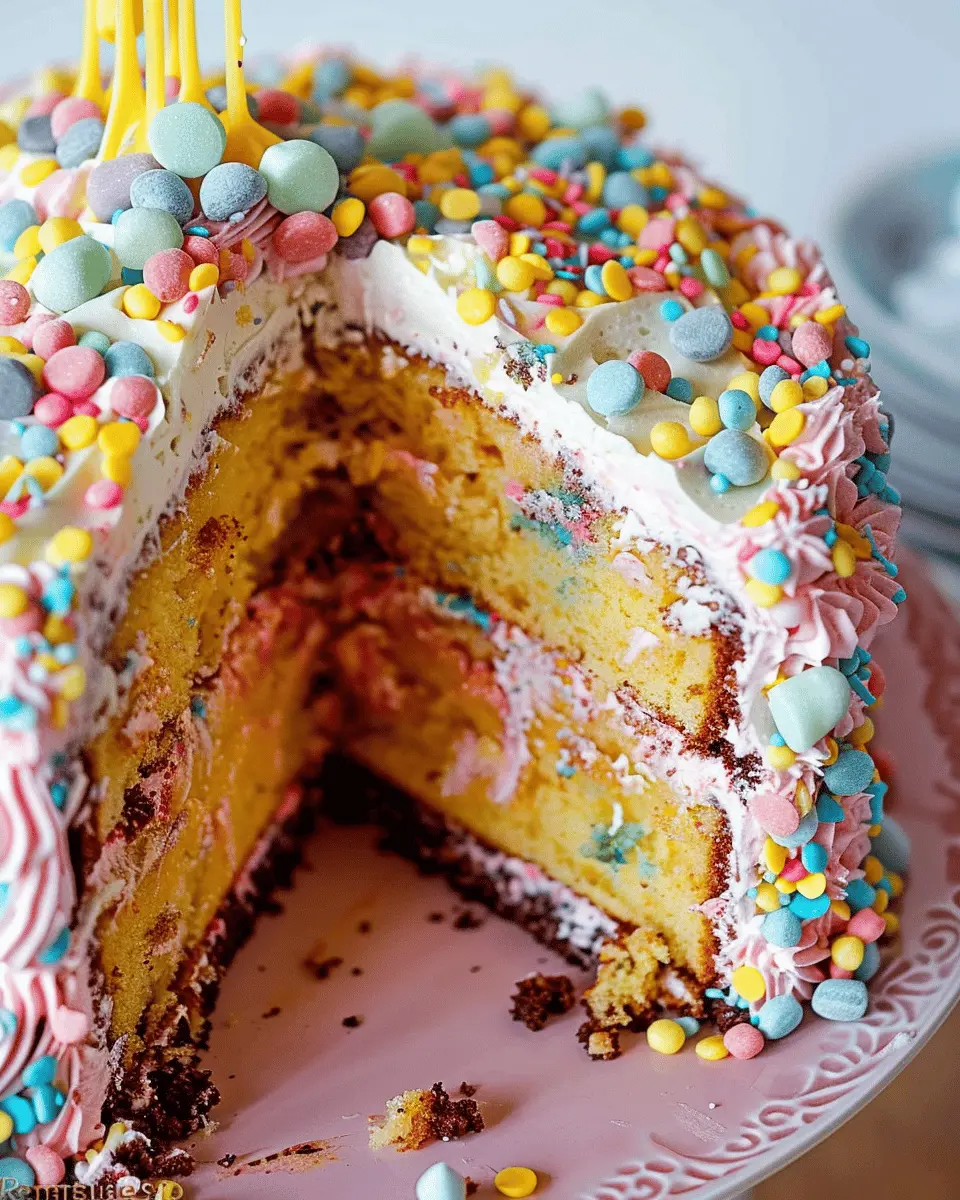
- Birthday Parties: Use vibrant colored frostings and lots of sprinkles.
- Baby Showers: Soft pastels with cute animal toppers create a charming look.
- Holidays: Seasonal decorations like candy canes for Christmas or a floral theme for spring.
Tailoring your cake’s appearance to your event will surely impress your guests, enhancing their overall experience. For more themed serving ideas, check platforms like Pinterest for inspiration!
With these variations, whipping up a piñata cake can turn into a fun, personalized cooking adventure. Get creative and enjoy the process!
Cooking Tips and Notes for Piñata Cake
Importance of ingredient temperatures
When learning how to make a piñata cake, you’ll want to ensure your ingredients are at the right temperature. Room temperature ingredients, especially eggs and butter, blend more seamlessly, creating a smoother batter. This simple step can make a significant difference in achieving that fluffy texture we all love.
Sifting flour for the best texture
Sifting flour might seem like an extra step, but it’s vital for a light and airy cake. This process aerates the flour and removes any lumps, enhancing the batter’s overall consistency. Just ask pastry chefs; they swear by it! For a deeper dive into the benefits of sifting, check out this resource on baking techniques.
Ensuring even cake layers
To bake even layers, use the same measuring cups for all ingredients. Utilize a kitchen scale if you have one, as weighing ingredients can lead to precision. Additionally, rotating your cake pans halfway through the baking time can help achieve uniformity and prevent any gooey centers. This attention to detail will surely impress your friends when you unveil that beautifully crafted piñata cake!
Serving Suggestions for Piñata Cake
Ideas for Special Occasions
Looking to add a little extra flair to your celebrations? Piñata cake is perfect for birthdays, baby showers, and even bridal showers. Imagine the thrill on your guests’ faces as they slice into the cake and colorful candies spill out—it’s a guaranteed showstopper! You can also tailor the fillings to match your theme, whether it’s pastel candies for a baby shower or vibrant sprinkles for a birthday bash.
Unique Ways to Present the Cake
Presentation is key when learning how to make a piñata cake. For a whimsical touch, place the cake on a fun, decorated platter and surround it with additional treats like cupcakes or cookies. You could even use a clear cake dome, allowing the beautiful layers to shine through. Consider creating a dessert table that features your piñata cake alongside themed decorations, which adds an inviting atmosphere for your guests.
Pairing Suggestions for Drinks
To complement the sweetness of your piñata cake, consider serving refreshing beverages like sparkling water infused with fruit, iced herbal teas, or colorful mocktails. The fizz of sparkling soda pairs nicely with the cake’s texture, balancing its richness. Also, don’t forget to offer coffee as a warm drink option—it’s a classic combination that many guests will appreciate.
These serving suggestions will elevate your cake experience and turn any gathering into a memorable occasion!
Time Breakdown for Piñata Cake
Preparation time
Making a delightful piñata cake starts with about 30 minutes of prep. This gives you time to gather your ingredients, preheat the oven, and prepare your cake pans. Don’t forget to set up your workspace, as an organized area makes the process smoother and more enjoyable!
Baking time
Next, you’ll bake the cakes for approximately 30-35 minutes. Keep an eye on them—every oven behaves differently! While they’re baking, you can tidy up or prepare your fun-filled surprises for the center.
Total time
In total, you’re looking at about 1.5 to 2 hours from start to finish. This includes prep, baking, and decorating. Planning a gathering? Knowing how to make a piñata cake will surely wow your guests! If you’re interested in timing tips, check out sources like King Arthur Baking for expert guidance.
Nutritional Facts for Piñata Cake
Calories per serving
When diving into the world of sweet treats, it’s always good to know what you’re indulging in! A slice of this delightful piñata cake contains approximately 350 calories. This number can vary based on portion size and specific ingredients used, so consider it a delicious treat to enjoy occasionally rather than an everyday choice.
Breakdown of macros
Understanding the macronutrient profile can help you make informed choices. Each slice typically provides:
- Carbohydrates: 50g
- Proteins: 4g
- Fats: 14g
If you’re curious about how to make a piñata cake without compromising too much on nutrition, consider using whole grain flour and reducing sugar content. For a detailed look at nutritional guidelines, check out resources from the USDA or the Mayo Clinic.
Always remember, enjoying dessert is all about balance—sparking joy while being mindful of your overall dietary goals!
FAQs about Making Piñata Cake
What types of candies can I use for filling?
When considering how to make a piñata cake, the filling is where the magic happens! You can get creative with your choices:
- Chocolate Candies: Mini chocolate bars, M&M’s, or chocolate eggs add a sweet touch.
- Gummies: Gummy bears, sour worms, or jelly beans can provide fun flavors and colors.
- Hard Candy: Think about using candy corn, jolly ranchers, or any small hard variety.
The key is to choose candies that won’t melt too easily, as you want them to hold their shape when the cake is sliced open. Plus, don’t shy away from mixing sweet and sour for an exciting flavor burst!
How do I store leftover piñata cake?
If you find yourself with leftover cake (which may be a rare occurrence), storing it properly is essential. Keep the cake in an airtight container at room temperature for up to three days. Just be cautious about humidity, as it can affect the cake’s texture.
If you want to extend its shelf life, you can refrigerate it—but make sure to wrap it well to prevent it from drying out.
Can I make this cake in advance?
Absolutely! In fact, making your piñata cake in advance can reduce stress as the event approaches. It’s best to bake the layers and let them cool completely, then wrap them tightly in plastic wrap. You can freeze the layers for up to 3 months. When you’re ready to assemble, simply thaw them overnight in the fridge.
By planning ahead, you can flaunt your baking skills without the last-minute rush! For more baking tips, you might check out resources like Bon Appétit for expert advice.
So, gather your ingredients and let the fun of how to make a piñata cake begin!
Conclusion on Making Piñata Cake
Recap of why piñata cakes are a must-try for homemade fun
In summary, learning how to make a piñata cake is a delightful journey into the world of creative baking. These cakes not only satisfy your sweet tooth but also offer a whimsical twist at any celebration—surprising your guests with a burst of colorful candies is a surefire way to bring smiles. Imagine the joy on faces when the cake is sliced open! The process can be as enjoyable as the result, making it a fantastic project to undertake with friends or family. Why reserve such fun just for parties? Let your imagination run wild and create memories in the kitchen! For more baking inspiration, check out The Spruce Eats for additional fun cake ideas.
PrintHow to Make a Piñata Cake: The Best Sweet Surprise for All Occasions
Learn how to create a fun piñata cake that surprises with candy inside, perfect for any celebration!
- Prep Time: 20 minutes
- Cook Time: 35 minutes
- Total Time: 55 minutes
- Yield: 8 servings 1x
- Category: Dessert
- Method: Baking
- Cuisine: American
- Diet: Vegetarian
Ingredients
- 2 cups all-purpose flour
- 1 cup sugar
- 1/2 cup unsalted butter
- 3 large eggs
- 1 cup milk
- 2 tsp baking powder
- 1 tsp vanilla extract
- 2 cups assorted candy (for filling)
Instructions
- Preheat your oven to 350°F (175°C).
- In a large bowl, cream together the butter and sugar until light and fluffy.
- Add the eggs one at a time, beating well after each addition.
- Stir in the vanilla extract.
- In another bowl, combine the flour, baking powder, and salt.
- Gradually add the dry ingredients to the wet mixture, alternating with milk, until fully incorporated.
- Pour half of the batter into a greased cake pan.
- Add the candy to the center of the batter in the cake pan.
- Top with the remaining batter.
- Bake for 30-35 minutes or until a toothpick comes out clean.
- Let cool before frosting and decorating.
Notes
- For a colorful piñata, use a variety of candies.
- Store the cake in an airtight container to keep it fresh.
Nutrition
- Serving Size: 1 slice
- Calories: 320
- Sugar: 25g
- Sodium: 150mg
- Fat: 15g
- Saturated Fat: 8g
- Unsaturated Fat: 5g
- Trans Fat: 0g
- Carbohydrates: 40g
- Fiber: 1g
- Protein: 4g
- Cholesterol: 70mg
Keywords: piñata cake, cake recipes, dessert ideas