Basics of Bread Making
Why is homemade bread making worthwhile?
Ah, the aroma of freshly baked bread—a scent that can turn any house into a home. If you’ve ever walked past a bakery and felt that draw, you’re not alone. Making your own bread is not just a culinary skill; it’s an act of love, creativity, and satisfaction. With the Basics of Bread Making, you can transform simple ingredients into something magical.
One of the greatest joys of bread making is the ability to customize your loaf. Imagine creating a delicious focaccia topped with fresh herbs, garlic, or even your favorite vegetables. You have complete control over the ingredients, allowing you to experiment with flavors but also ensuring you’re avoiding preservatives or unnecessary additives. Plus, homemade bread can be made to fit any dietary needs, be it gluten-free or vegan!
Crafting bread can also be surprisingly therapeutic. Kneading dough is a fantastic stress reliever; it’s a physical process that allows you to be present in the moment. With every fold and push, you’re molding not just your ingredients, but also an experience. And when you finally take that loaf out of the oven, it’s hard to beat the feeling of achievement that comes from creating something so comforting and satisfying.
Essential Ingredients for Bread Making
Before diving into the recipe for Classic Crispy Focaccia, let’s go through the basics—bread relies on just a few key ingredients:
- Flour: The backbone of any bread. All-purpose flour works beautifully, but experiment with whole grain for a heartier texture.
- Water: Vital for activating the yeast and creating dough. The temperature matters; lukewarm (around 110°F) is ideal.
- Yeast: The leavening agent that makes your bread rise. Instant or active dry work just fine!
- Salt: Essential for flavor and strengthening the dough.
- Olive oil: Adds richness and plays a role in the dough’s texture.
For detailed insights and more resources, consider checking out this How to Make Bread at Home guide.
Incorporating these basics into your routine allows you to connect with the process while honing your skills. So, ready to embark on your bread-making journey? Let’s get those ingredients ready!
Ingredients for Basic Bread Making
Essential ingredients for bread
When it comes to the basics of bread making, having the right ingredients is crucial for achieving that perfect loaf of focaccia. Here’s what you need:
- Flour: All-purpose flour is ideal, but bread flour can offer even more structure.
- Water: Use lukewarm water to activate the yeast and help the dough rise.
- Yeast: Active dry yeast is a great choice, as it provides flavor and aeration.
- Salt: Essential for flavor and strengthening the dough structure.
- Olive oil: Adds moisture and enhances the bread’s texture.
Optional ingredients for customization
Once you have your essentials, you can get creative! Consider adding:
- Herbs: Rosemary, thyme, or oregano for a flavorful twist.
- Cheese: Feta or grated Parmesan for a savory addition.
- Olives: To deepen the flavor profile and add a delightful texture.
Feel free to explore these options—it’s a fun way to personalize your focaccia! For more insights on bread-making techniques, check out this comprehensive guide on BBC Good Food.
Step-by-Step Preparation for Basic Bread
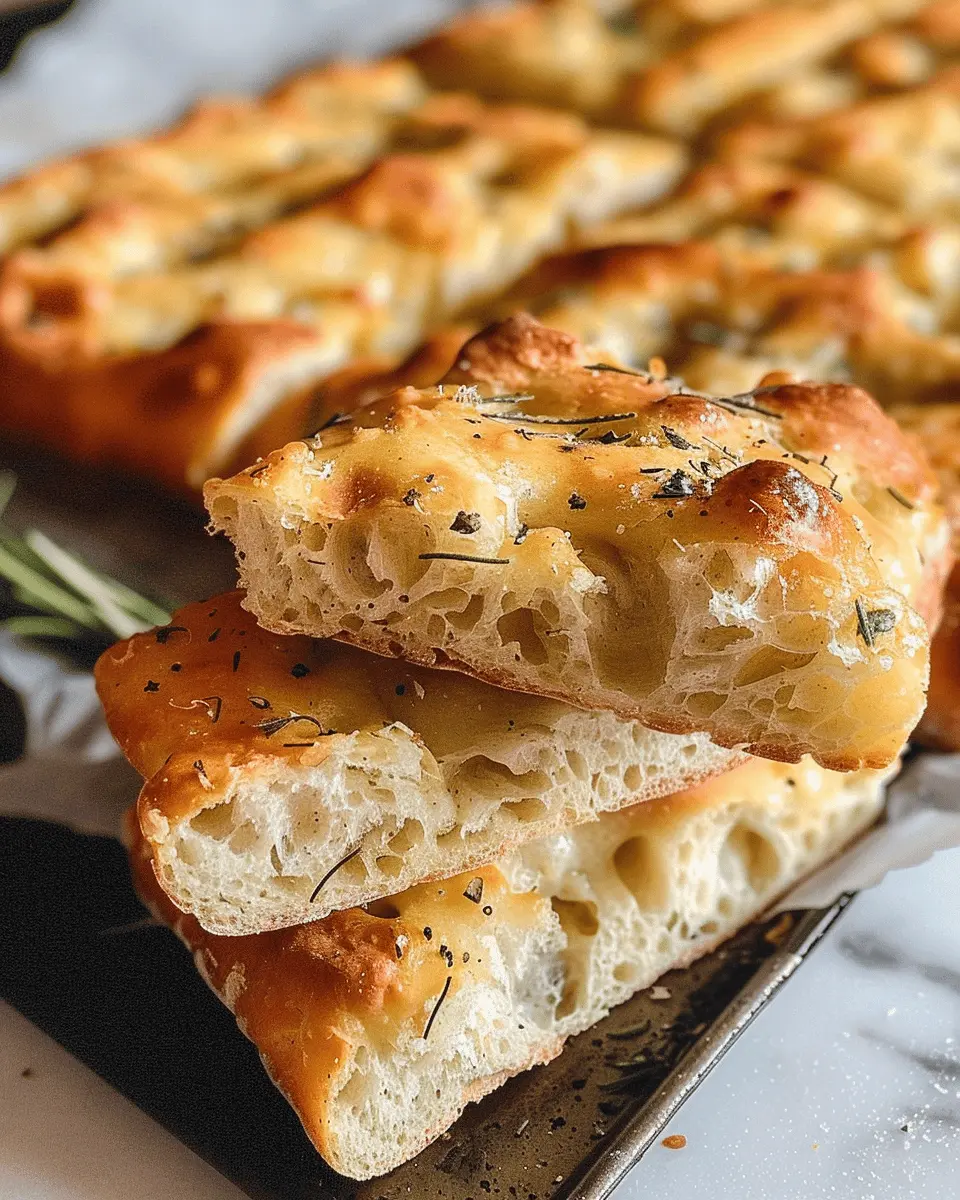
Making bread at home is not just rewarding; it’s a delightful experience that fills your kitchen with warmth and the comforting aroma of freshly baked delights. Whether you’re looking to impress your friends or simply enjoy the basics of bread making, let’s dive into the process of crafting classic crispy focaccia.
Activate the yeast
To start, you need to awaken the dormant yeast. This is a crucial step that helps in the rising process of your dough. Here’s how to do it:
- Ingredients: 2 teaspoons of active dry yeast, 1 teaspoon of sugar, and 1 cup of warm water (about 110°F).
- Instructions: In a small bowl, combine the yeast, sugar, and warm water. Stir gently and let it sit for about 5-10 minutes until it becomes frothy. This froth indicates that your yeast is alive and kicking!
This process is essential; without it, your bread won’t rise properly. If you’re new to baking, check out some helpful resources like the King Arthur Baking Company for more yeast activation tips.
Combine dry ingredients
Next up, it’s time to bring together the dry ingredients. You’ll need:
- Ingredients: 4 cups of all-purpose flour, 2 teaspoons of salt.
- Instructions: In a large mixing bowl, whisk together the flour and salt until well combined. Mixing these ingredients ensures even distribution of the salt, which is key to flavor.
A pro tip: Consider using bread flour if you want a chewier texture.
Mix the dough
Now, let’s bring it all together.
- Instructions: Make a well in the center of the dry mixture and pour in the activated yeast mixture. Using a wooden spoon or your hands, mix until a rough dough forms. Don’t worry if it looks a bit shaggy at this point; that’s normal!
First rise
This step is where the magic happens.
- Instructions: Transfer the dough to a lightly oiled bowl, cover it with a clean kitchen towel or plastic wrap, and place it in a warm spot. Let it rise for about 1 to 2 hours, or until it doubles in size. If you’re pressed for time, a warm oven (turned off) can work wonders!
Shape the dough
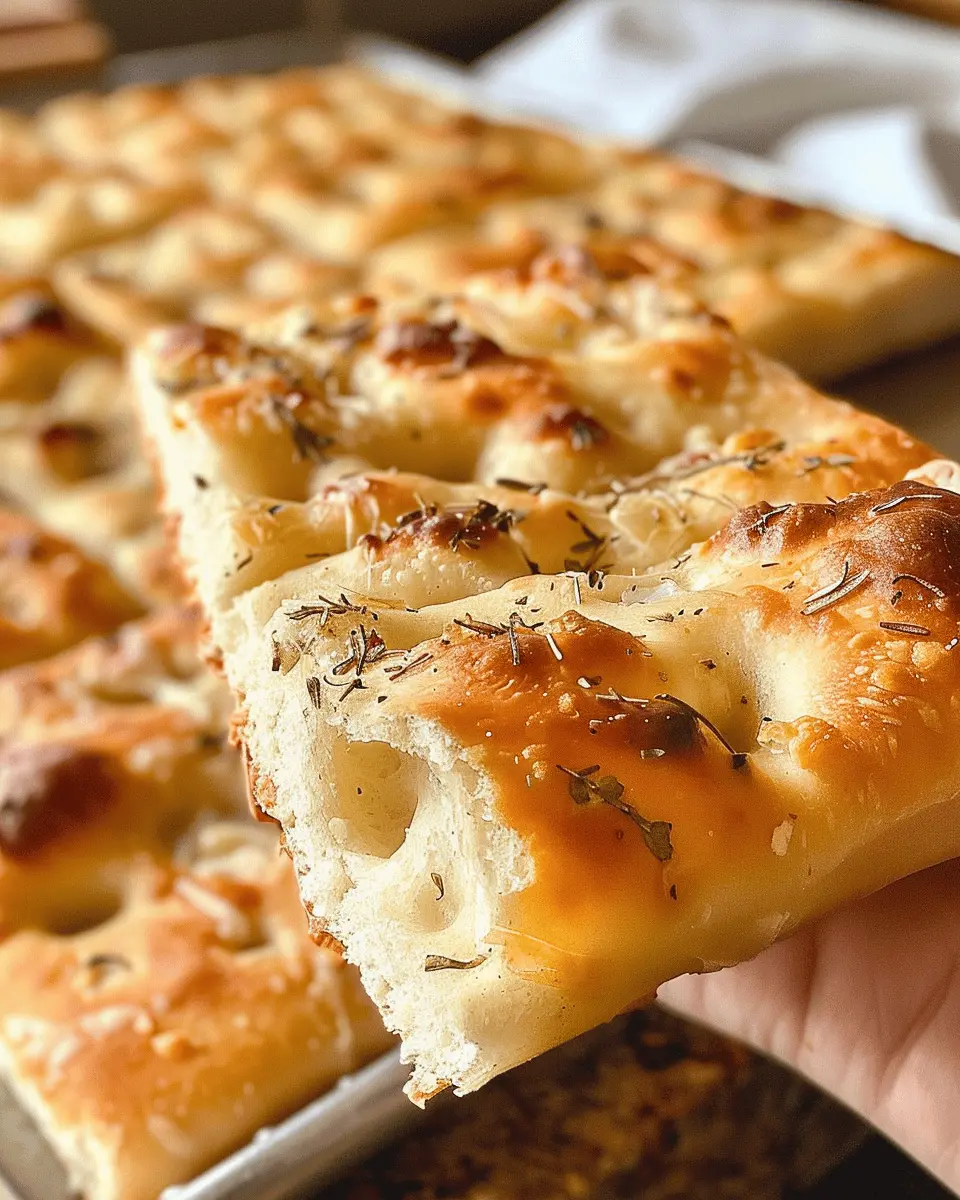
Once your dough has risen beautifully, it’s time to shape it into focaccia.
- Instructions: Gently punch down the dough to release any air bubbles, then transfer it to a greased baking pan. Use your fingers to stretch and shape the dough to fit the pan. Create dimples in the surface; this is where you’ll sprinkle seasonings later!
Second rise
Another rise? Yes! This step adds to the bread’s airy texture.
- Instructions: Cover the shaped dough and let it rise for another 20-30 minutes. During this time, preheat your oven to 400°F.
Preheat the oven
Oven preheating is crucial for achieving that crisp crust we all crave.
- Instructions: Make sure your oven is at the right temperature before placing your focaccia inside. This ensures immediate baking, leading to a deliciously crunchy exterior.
Bake the bread
Finally, it’s time for the best part: baking!
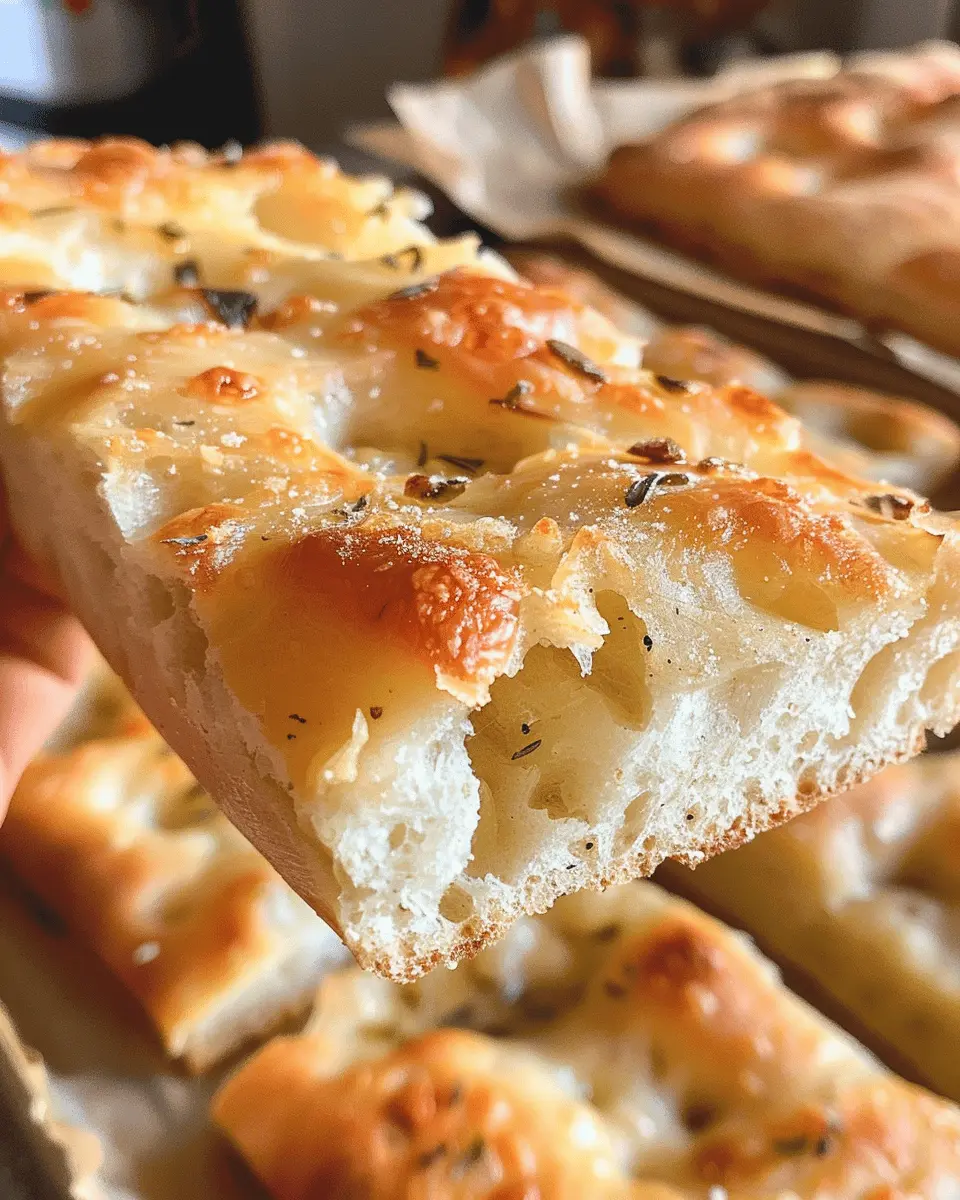
- Instructions: Sprinkle your focaccia with olive oil, herbs, and any toppings you love—think cherry tomatoes, olives, or indeed, non-perishable cheese options. Bake for 20-25 minutes or until golden brown. Let it cool for a few minutes before slicing.
Baking your own bread doesn’t just serve a need; it’s a creative outlet. Each loaf tells its own story, flavored by your personal touch from the basics of bread making. Enjoy your homemade classic crispy focaccia, and don’t forget to share with friends (or keep it all for yourself; no judgment here)!
Variations on Basic Bread
When it comes to the basics of bread making, one of the most exciting aspects is the endless possibilities for variations. Let’s dive into ways you can elevate your bread-making game and surprise your taste buds!
Whole Grain Bread
Embracing whole grains takes your bread from basic to heroic. By swapping out part of your all-purpose flour for whole wheat or a blend of grains like rye or spelt, you create a heartier loaf bursting with flavor and nutrition. Whole grain bread not only provides more fiber but also enhances the bread’s texture. Don’t forget to add a bit of honey or molasses to balance the nuttiness; this will ensure your whole grain bread is both tasty and satisfying.
Herb and Cheese Bread
Imagine slicing into a loaf filled with aromatic herbs and gooey cheese! By incorporating fresh ingredients like rosemary, thyme, or even garlic along with shredded cheese, you can transform a simple focaccia into a flavor-packed treat. This herb and cheese bread pairs perfectly with soups, salads, or simply enjoyed on its own. It’s an easy way to impress your friends during a cozy dinner at home.
Sweet Bread with Fruits
For those with a sweet tooth, consider trying your hand at a fruit-laden sweet bread. Dried fruits like cranberries, apricots, or even chocolate chips can make your bread a delightful addition to breakfast or brunch. Adding a sprinkle of cinnamon or a drizzle of honey creates a wonderfully aromatic experience. This type of bread can be particularly comforting during the colder months, making your home feel warm and inviting.
With these variations, your basics of bread making will never feel dull! What’s your favorite type of bread? Explore these options and let your creativity shine!
Cooking Tips and Notes for Basic Bread
Common pitfalls
When diving into the basics of bread making, it’s easy to encounter a few hiccups. One of the most frequent issues is over or under-kneading the dough. Over-kneading can lead to a tough texture, while under-kneading leaves you with a flat loaf. Another common pitfall is insufficient proofing; bread needs time to rise properly before baking. Lastly, baking at the wrong temperature can affect crispiness. Ensure your oven is preheated—it makes a world of difference!
Best practices for success
To master your classic crispy focaccia, follow these tips:
- Use high-quality ingredients: Flour matters! Opt for bread flour for a better rise and texture.
- Measure precisely: A kitchen scale ensures accuracy in your measurements, leading to consistent results.
- Keep it warm: Yeast thrives in warmth. Consider placing your dough in a warm spot to encourage rising.
- Experiment with toppings: Infuse flavors by adding herbs or garlic before baking for a delightful twist.
Baking bread is a rewarding experience! With these tips in your arsenal, you’ll navigate the basics of bread making like a pro. Looking for more hands-on advice? Check out this bread-making guide for further insights!
Serving Suggestions for Homemade Bread
Pairing with Soups and Salads
There’s something undeniably delightful about enjoying your crispy focaccia alongside a warm bowl of soup or a vibrant salad. The crunchy texture of the focaccia complements brothy soups like minestrone or creamy ones like tomato basil. For salads, consider serving it with a Mediterranean mix loaded with olives and feta.
If you want to elevate your bread and soup experience, try dipping the focaccia in a rich olive oil and balsamic vinegar combination. This ultimately transforms a simple meal into something extraordinary. Plus, focaccia is great for sopping up all those delicious leftover flavors!
Creative Sandwich Ideas
Using your homemade focaccia as a sandwich base opens the door to countless delicious creations. Why not layer slices of grilled chicken ham, lettuce, and a zesty aioli for a fresh twist? Or try turkey bacon with avocado and a touch of truffle oil inside—pure indulgence!
These ideas are perfect for meal prep or a quick lunch. You can even get creative and turn these into panini by grilling the focaccia. With these basics of bread making, your focaccia won’t just shine in its own right; it will become the star of your meals!
For more pairing tips, check out this resource or explore creative sandwich ideas here.
Time Breakdown for Bread Making
When diving into the basics of bread making, understanding the time commitment involved can set you up for success. Here’s an easy breakdown to help you plan your baking adventure.
Preparation time
You’ll need about 15 minutes to gather ingredients, mix, and knead your dough. Keeping the workspace organized can make this step enjoyable and quick.
Rising time
Patience is key! Allow your dough to rise for 1 to 2 hours until it doubles in size. This is where the magic happens—don’t skip it!
Baking time
Once the dough has risen, baking it will take around 20 to 25 minutes. Your kitchen will smell like heaven!
Total time
In total, allocate about 2 hours and 40 minutes for the entire process, but don’t forget to savor the journey! The joy of making focaccia is in both the process and the delicious end result.
For more insights into bread-making techniques, check out resources like King Arthur Baking or The Fresh Loaf. Happy baking!
Nutritional Facts for Homemade Bread
When diving into the Basics of Bread Making, understanding the nutritional profile of your delicious creation is essential. Let’s break it down:
Calories per slice
A typical slice of homemade focaccia contains about 120-150 calories. This makes it a great choice for a light snack or an addition to a meal without piling on too many extra calories.
Protein content
Each slice packs around 3-5 grams of protein, depending on your choice of flour and any added toppings. This is a decent boost, especially for a carb-centric food.
Sodium levels
Homemade focaccia can have about 180-250 mg of sodium per slice, depending on how much salt you use. To keep it healthier, feel free to adjust the salt level according to your taste preferences.
Making bread at home not only enhances your culinary skills but also allows you to control the ingredients for a more nutritious outcome. For more tips on bread-making, check out resources from the USDA or the Whole Grains Council.
FAQs about Bread Making
How do I know if my bread dough is ready?
Knowing when your dough is ready is one of the Basics of Bread Making that every beginner needs to master. A good rule of thumb is the “poke test.” Simply poke the dough with your finger; if it springs back slowly, it’s ready. If your finger leaves a deep indentation, give it more time to rise. Additionally, look for a smooth and elastic texture. If your dough feels sticky or overly wet, try dusting it with a little flour to improve its consistency.
Can I make bread without a stand mixer?
Absolutely! While a stand mixer can make kneading easier, it’s not a necessity. You can use your hands—it’s quite therapeutic! Just toss your ingredients together and start folding and pushing the dough, turning it over as you go. Kneading by hand typically takes around 10–15 minutes, and it’s a great workout for your arms. Many bakers find this method connects them more intimately with the bread-making process.
What can I use instead of bread flour?
If you don’t have bread flour on hand, don’t worry! You can swap it with all-purpose flour, which is widely available. To mimic the higher protein content of bread flour, try adding a tablespoon of vital wheat gluten to your all-purpose flour. This subtle adjustment can significantly improve the texture and chewiness of your focaccia. For a gluten-free option, consider using a blend designed for baking, ensuring to follow the package instructions for the best results.
These tips should equip you with a deeper understanding of the bread-making journey. For more insights, check out resources from expert bakers like King Arthur Baking or The Kitchn. Happy baking!
Conclusion on Bread Making
Embracing the Art of Bread Making
Bread making isn’t just a culinary task; it’s a delightful journey that transforms simple ingredients into a warm, comforting staple. By mastering the basics of bread making, you can impress your friends and family with your homemade classic crispy focaccia and savor the unmatched aroma of freshly baked bread wafting through your kitchen.
Remember, each loaf comes with its unique personality, shaped by the care and attention you invest. Don’t hesitate to experiment with flavors and toppings—think sun-dried tomatoes, olives, or herbs. With a little practice and patience, you’ll find yourself embracing the art of bread making like a seasoned pro. For inspiration, check out resources like the Bread Baking Guide to deepen your knowledge and skills!
PrintBasics of Bread Making: Perfect Crispy Focaccia for Everyone

This article explores the fundamentals of making delicious, crispy focaccia at home, perfect for beginners and experienced bakers alike.
- Prep Time: 20 minutes
- Cook Time: 25 minutes
- Total Time: 2 hours 45 minutes
- Yield: 12 servings 1x
- Category: Breads
- Method: Baking
- Cuisine: Italian
- Diet: Vegetarian
Ingredients
- 4 cups all-purpose flour
- 2 teaspoons salt
- 1 teaspoon sugar
- 2 teaspoons instant yeast
- 1 3/4 cups warm water
- 1/4 cup olive oil
Instructions
- In a large bowl, combine flour, salt, sugar, and instant yeast.
- Add warm water and olive oil, mixing until a sticky dough forms.
- Cover the bowl with a damp cloth and let it rise for about 2 hours.
- Preheat your oven to 425°F (220°C).
- Transfer the risen dough to a greased baking sheet and stretch it out to fit the pan.
- Use your fingers to dimple the surface of the dough.
- Drizzle with olive oil and sprinkle with coarse salt and herbs if desired.
- Bake for 20-25 minutes until golden brown.
- Allow to cool slightly before slicing and serving.
Notes
- For extra flavor, add toppings like rosemary, olives, or sun-dried tomatoes before baking.
- This recipe can be easily doubled for larger gatherings.
Nutrition
- Serving Size: 1 piece
- Calories: 220
- Sugar: 0.5g
- Sodium: 400mg
- Fat: 8g
- Saturated Fat: 1g
- Unsaturated Fat: 6g
- Trans Fat: 0g
- Carbohydrates: 32g
- Fiber: 1g
- Protein: 6g
- Cholesterol: 0mg
Keywords: bread, focaccia, baking, recipe, crispy